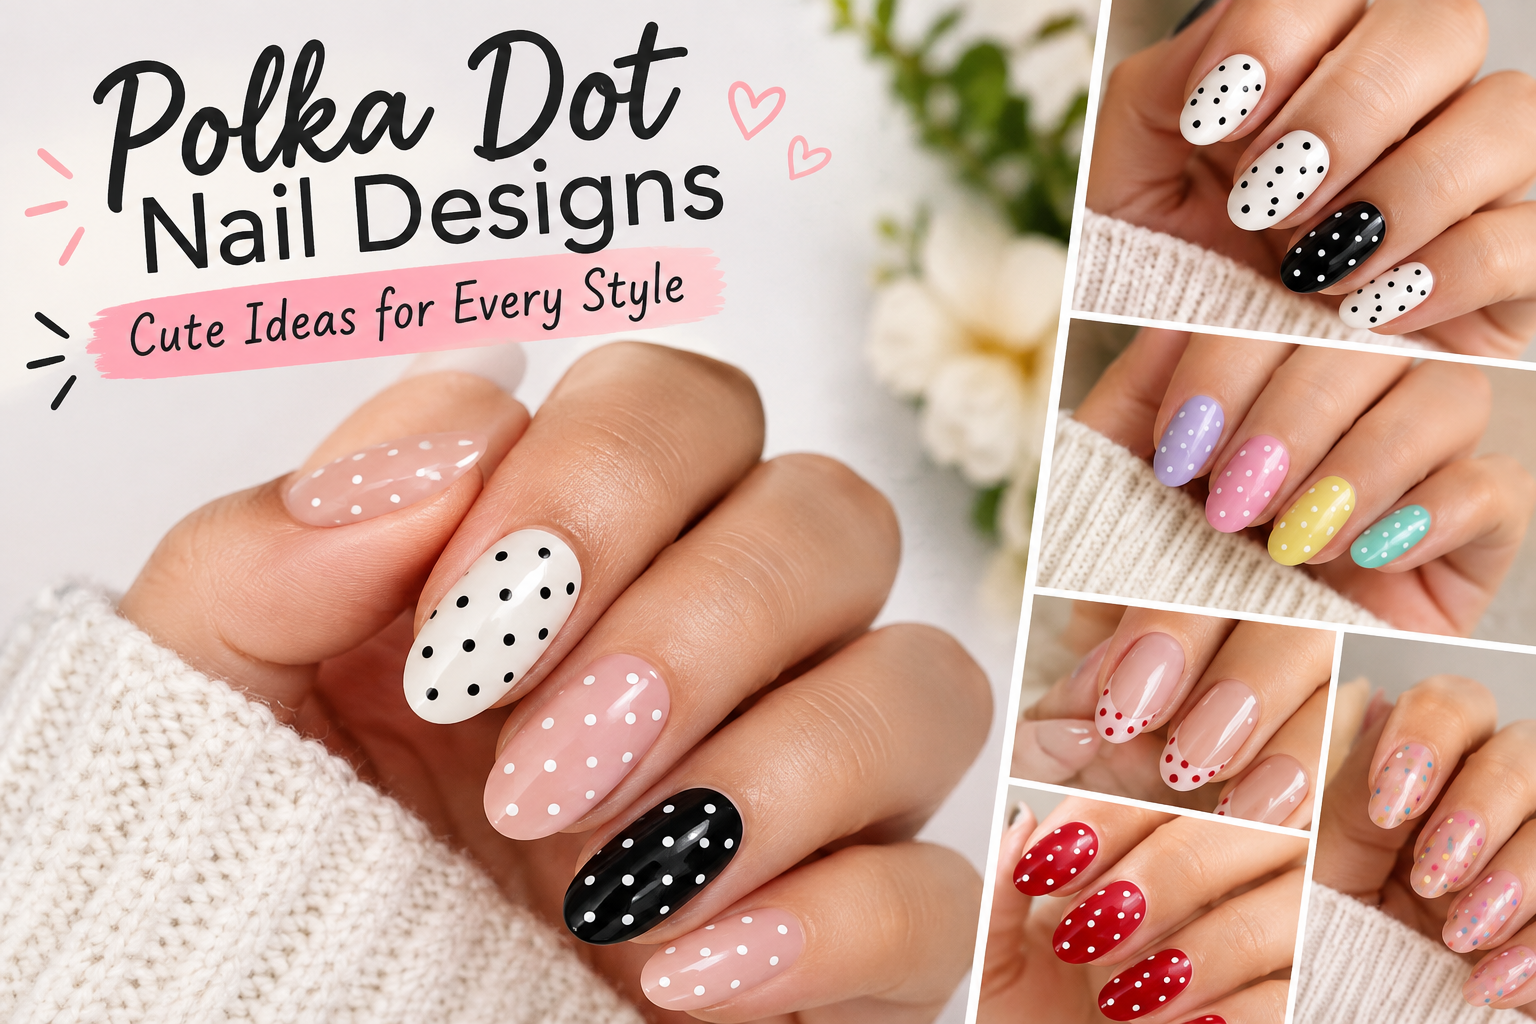
Polka Dot Nail Designs: Cute Ideas for Every Style
Some nail art needs a steady hand, a lot of patience and a professional kit. Polka dots need a dotting tool, two bottles of polish and about twenty minutes.
That is a big part of why polka dot nail designs keep coming back. The pattern is simple enough for a beginner, yet it can look minimal, playful, retro or dressy depending on how you use it. This guide covers the most popular designs, how to match them to your nail length and shape, colour combinations that work, a step-by-step DIY method and the mistakes that most often spoil the look.
What Makes Polka Dots So Versatile?
Polka dots are one of the few patterns that suit almost any mood. Change the size, spacing or colour of the dots and the whole manicure changes with it.
From Retro Dots to Modern Nail Art
Polka dots are a classic print that has appeared in clothing, accessories and home décor for decades, so many people associate them with a retro, vintage feel. Today’s polka dot nails keep that nostalgic charm but update it. Instead of identical black dots on white, modern polka dot nail art plays with sheer bases, tiny micro dots, glossy or glazed finishes and mismatched colours.
Beauty coverage in 2026 has also pointed towards micro dots, monochrome sets, dotted French tips and mixed dot sizes. In short, the trend is moving towards lighter, more minimal dots rather than big, heavy patterns.
Why Polka Dots Work for Different Styles
The same basic pattern can look very different depending on how you style it:
- Minimalist: a few tiny dots over a sheer or nude base
- Elegant: small black or gold dots on a soft, neutral colour
- Playful: bright colours and dots of different sizes
- Vintage: red and white, or black and white, with larger dots
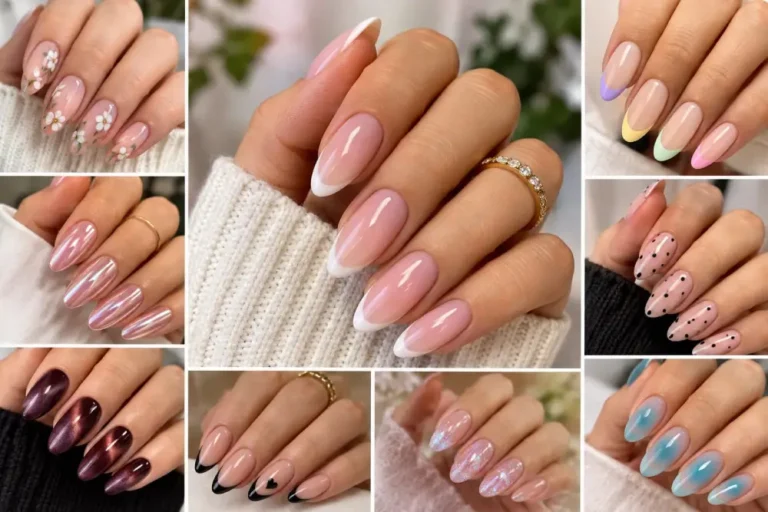
- Modern: dots combined with French tips, negative space or a glossy jelly finish
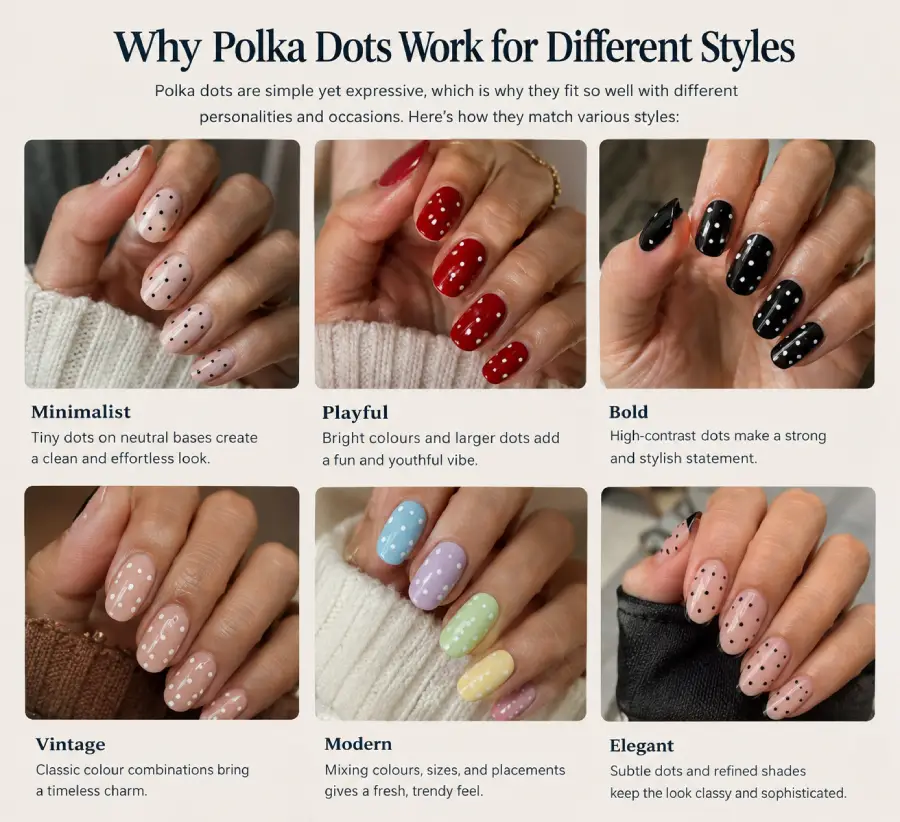
Because of this range, polka dots work equally well for an office manicure and a weekend party set.
Popular Designs to Try
Here are the designs worth knowing, from the safest choices to the more experimental ones.
Classic Black and White Polka Dot Nails
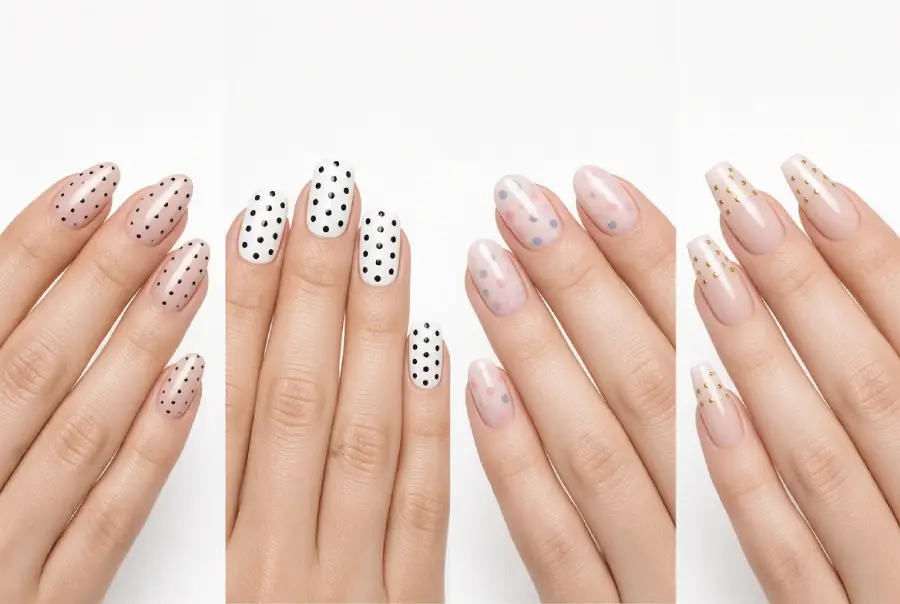
Black dots on a white base (or white dots on black) is the original high-contrast look. It is easy to read from a distance, goes with almost any outfit and is a good first design if you are new to nail art. Black and white polka dot nails are also forgiving, because even slightly uneven dots still look intentional.
Minimalist Micro-Dot Nails
Instead of a bold pattern, minimalist polka dot nails use very small dots scattered over a sheer pink, milky white, nude or clear glossy base. The dots are light and spaced out, so they read more like a delicate detail than a statement. If you want simple polka dot nails for everyday wear, start here.
Polka Dot French Tips
This design mixes two familiar ideas. You keep the French tip line, then add a few dots on the nail bed, or you use dots to decorate the tip itself. Polka dot French tip nails look neat and a little more modern than a plain French manicure. You can use a classic white tip with black dots, or choose a softer pairing like a brown tip with cream dots.
Colourful Polka Dot Nails
Bright polish on a bright base can look fun when the colours are chosen with care. The safest approach is to pick a base colour and a contrasting dot colour, such as yellow with blue or pink with green, so the dots stay visible. If you use many colours at once, keep the dots a similar size so the design looks lively rather than chaotic.
Pastel Polka Dot Nails
Soft pink, baby blue, lavender, pale yellow and mint make a gentle, fresh combination. Pastel polka dot nails work well in spring and summer. Pair a pastel base with white dots, or use two pastel shades that sit close together for a soft, tonal effect.
Red and White Polka Dot Nails
Red with white dots has a strong retro feel. It is bold without being complicated, and the contrast makes even a basic set look finished. A plain nude base with a few red dots is a lighter version if full red feels like too much.
Chrome and Metallic Polka Dots
Gold, silver, pearl or chrome dots add shine to an otherwise simple manicure. A sheer pink or nude base with a few metallic dots can look like tiny pieces of jewellery on your nails. This is a good option when you want something a little dressier.
Jelly Polka Dot Nails
A jelly finish is a sheer, glossy, slightly see-through polish. Placing small dots on top creates a light, juicy look that feels modern and soft. Use a translucent pink, peach or clear base and white or contrasting dots.
Cat-Eye Polka Dot Nails
Cat-eye polish contains magnetic particles that create a shimmering line when you hold a magnet near the wet polish. Adding small contrasting dots on top of a cat-eye base makes the dots stand out against the shimmer. It takes one extra step compared with regular polish, so it suits people who already own a magnetic polish.
Mismatched Polka Dot Nails
Here, each nail gets a slightly different colour or dot arrangement. To keep it from looking random, stay within a small colour palette. For example, use three shades of green or a mix of pinks, then vary the dot size or placement from nail to nail.
How to Choose the Right Design
The best design is the one that suits your nails, not just the one that looks good in a photo.
Best Designs for Short Nails
On short nails, space is limited, so smaller dots and fewer dots usually look cleaner. Good options include:
- Micro dots over a sheer base
- Dots on only one or two accent nails
- Vertical rows of dots, which can make nails look slightly longer
- Negative space designs, where part of the nail is left bare
Very large dots can crowd a short nail, so keep them small or limit them to a single accent nail.
Best Designs for Long Nails
Long nails give you room to experiment. You can use larger dots, a mix of dot sizes, French tips combined with dots or a more detailed pattern across the whole nail. Just keep the spacing even so the design does not look cluttered.
Designs for Almond, Square, Oval and Coffin Nails
Nail shape affects how a pattern looks, so it helps to place the dots with the shape in mind.
| Nail Shape | Placement Idea |
|---|---|
| Almond | Scatter dots lightly, or run a few dots along the tapered tip to follow the curve |
| Square | A grid-like, evenly spaced pattern suits the straight edges well |
| Oval | Small, evenly spread dots keep the soft, rounded look |
| Coffin | Add dots near the flat tip, or use a French tip with a few dots for a clean finish |
There is no strict rule here. These are starting points, and the most important thing is that the dots look balanced on your own nails.
Easy DIY Polka Dot Nails for Beginners
Polka dot nails are one of the easier nail art designs to do at home because the technique is just placing dots. If you want to learn how to create polka dot nails yourself, this is the process. You can also adapt dots for the season — see our spooky Halloween nail art ideas for themed inspiration.
What You Need
- Base coat
- Two or more nail polish colours
- A dotting tool
- Top coat
- A small piece of foil or any clean, non-absorbent surface for holding a little polish
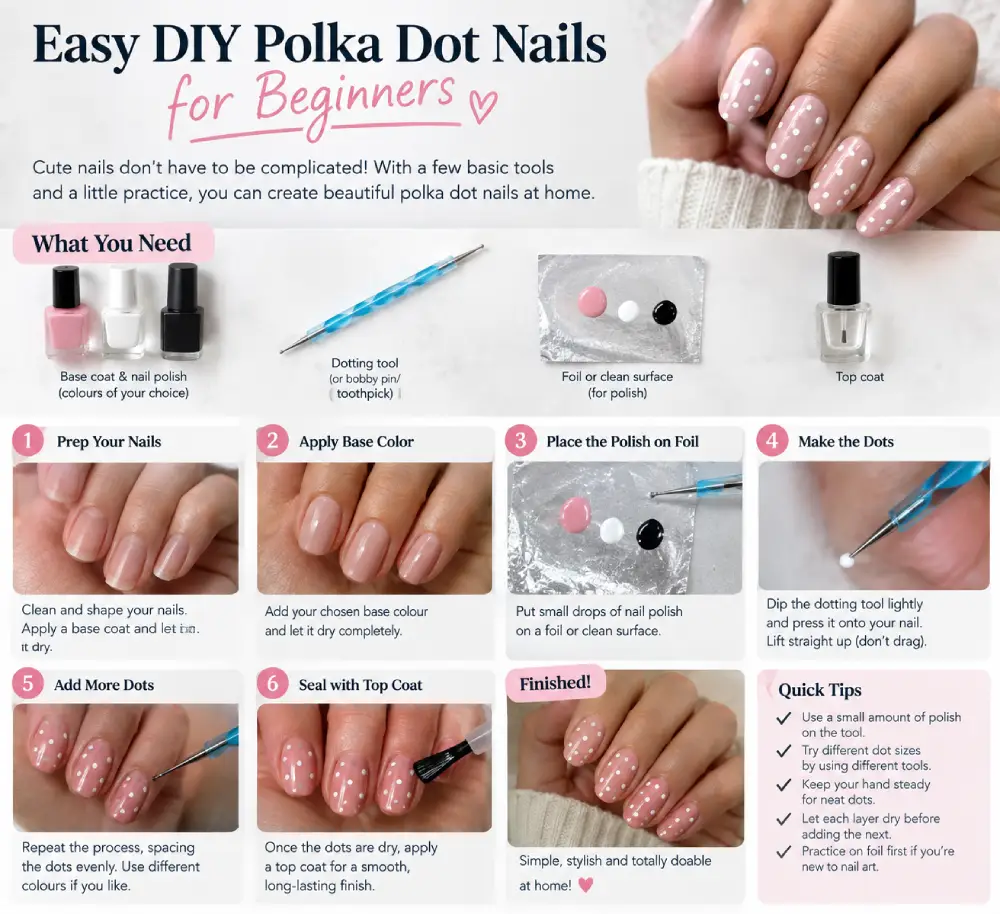
How to Make Even Dots
- Prep your nails. Shape them, push back the cuticles gently and wipe the surface clean so the polish sticks well.
- Apply a base coat and let it dry.
- Paint your base colour in one or two thin coats. Let it dry fully. This step matters, because dots placed on wet polish can smear or drag.
- Place a small drop of dot colour on the foil.
- Dip the tip of the dotting tool lightly into the polish. You want a small bead on the tip, not a thick glob.
- Press the tool straight down onto the nail and lift it straight up. Pressing rather than dragging is what gives you round dots.
- Re-dip the tool whenever the dots start to look smaller, so they stay a consistent size.
- Let the dots dry, then seal the manicure with a top coat.
How to Create Different Dot Sizes
Dot size depends on two things: the size of the tool tip and the amount of polish on it. A fine tip gives you micro dots, a medium tip gives standard dots and a large tip gives oversized dots. You can also vary the size slightly with the same tool by loading a bit more polish. If you want a graduated look, start with larger dots and make each one a little smaller as you move across the nail.
Easy Tools You Can Use at Home
You do not have to buy a dotting tool to start. Common household alternatives include:
- A toothpick: gives very small dots
- A bobby pin: the rounded end makes slightly bigger dots
- The back of a pen or a pencil with an eraser: useful for larger dots
- A thin nail art brush: helpful if you want more control over shape
Keep in mind that homemade tools may give less uniform dots than a proper dotting tool, so test them on a piece of paper or an old nail swatch first.
Best Colour Combinations
If you are unsure what to pair, these combinations are easy to start with.
- Black and white: the timeless option, high contrast and always clean
- Nude and white: soft and minimal, a good choice for beginners
- Pink and red: warm and romantic, best when the two shades are clearly different
- Blue and white: fresh and bright, especially in summer
- Green on green: a tonal look using a light and a deep shade of the same colour
- Pastel mix: several soft shades together for a gentle, cheerful look
- Brown and cream: warm and neutral, suited to autumn
- Metallic and neutral: gold or silver dots on nude, beige or soft pink
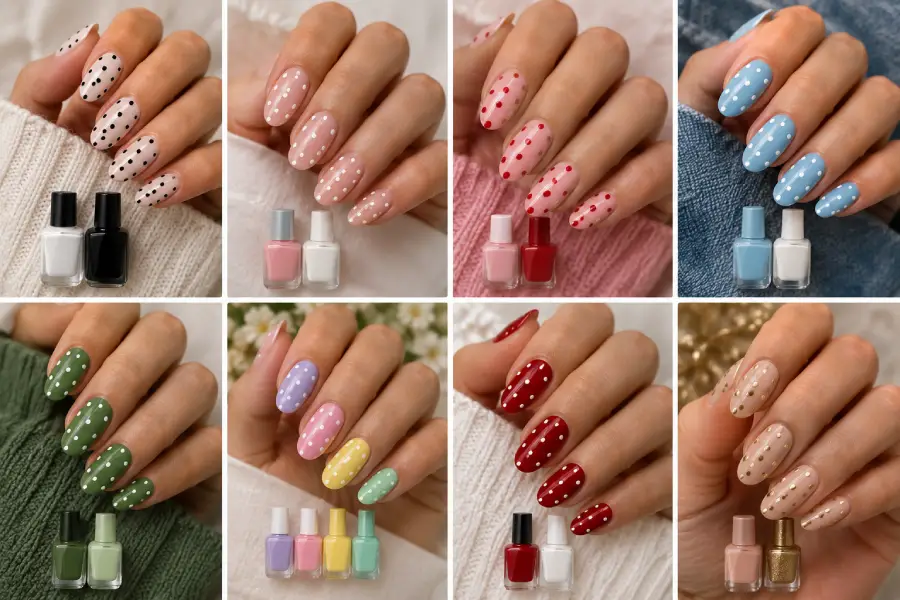
One practical rule: if your dots are hard to see, increase the contrast between the base and the dot colour.
How to Make Your Dots Look More Professional
A few small habits make a big difference to how polished your nails look.
- Keep the dot sizes consistent. Unless you are going for a mixed-size design on purpose, keep the dots the same size. Re-load the tool often so the size does not slowly shrink.
- Leave enough negative space. Dots that are packed too closely start to look messy. A bit of space around each dot makes the design look cleaner.
- Use contrasting colours. The dots should stand out from the base without clashing. Hold the polishes next to each other before you start.
- Let each layer dry properly. Rushing is the most common reason dots smudge or flatten.
- Finish with a glossy top coat. Apply it gently, as a thick or heavy-handed coat can drag the dots. A good top coat also makes the design look smooth and even.
Designs for Different Occasions
Everyday and Office Nails
Choose a neutral base, tiny dots and a restrained palette. Sheer pink with white dots, or nude with a few soft brown dots, looks tidy and subtle.
Party and Event Nails
Go for metallic or chrome dots, brighter colours or bigger dots. A dark base with gold or silver dots is a simple way to make a manicure feel more festive.
Summer Polka Dot Nails
Pastels, sorbet shades, yellow, pink, blue and multicolour sets all suit warmer weather. Jelly bases and glossy finishes are a good match for the season.
Elegant Evening Nails
Sheer bases, black dots, gold accents or pearl finishes keep the look refined. A small number of well-placed dots often looks more elegant than a full-coverage pattern.
Simple Ways to Personalize Your Dots
Once you are comfortable with basic dots, these ideas let you make the design your own:
- Mix dots with French tips for a clean, structured look
- Combine dots with negative space by leaving part of the nail bare
- Add tiny flowers or stars on one or two nails
- Use different dot sizes on the same nail
- Create an accent nail by putting the full dot pattern on one nail and keeping the rest plain
Common Mistakes to Avoid
- Making the dots too large. Big dots on small nails can overwhelm the design. Start smaller than you think you need.
- Using too much polish. A thick bead on the tool creates blobs instead of dots. Dip lightly and remove extra polish on the foil first.
- Creating uneven spacing. Place dots one at a time and look at the whole nail as you go. It can help to place the corner dots first and fill in between.
- Choosing colours with too little contrast. Pale yellow dots on a white base disappear. Choose a clearer difference between the base and the dots.
- Applying top coat too early. If the dots are not dry, the top coat brush can smear them. Wait until they feel dry to the touch.
How to Make Your Dots Last Longer
Nail art lasts longer when the foundation is right. For designs that must survive weeks of wear, gel nail designs are worth considering. Start with a clean, oil-free nail surface and always use a base coat. Apply thin layers of polish instead of thick ones, because thick layers take longer to dry and chip more easily. When you add the top coat, run the brush along the free edge of the nail as well, which helps seal the tips and reduces chipping. Reapplying a thin layer of top coat every few days can also help keep the shine. Wearing gloves for dishwashing and cleaning is another simple way to protect the finish.
Minimalist vs Bold: Which Suits You?
If you are still deciding, this comparison can help.
| Style | Base | Dot Style | Best For |
|---|---|---|---|
| Minimalist | Sheer or nude | Tiny dots | Everyday wear |
| Classic | White | Black dots | Timeless looks |
| French | Nude | Dotted tips | Modern elegance |
| Colourful | Bright or pastel | Contrasting dots | Playful manicures |
| Chrome | Neutral | Metallic dots | Events |
| Jelly | Sheer | Small translucent or opaque dots | Fresh, glossy looks |
| Maximalist | Bright | Mixed sizes and colours | Statement nails |
FAQs
Are polka dot nails easy for beginners?
Yes, Polka dot nails are one of the simplest nail art styles because the main skill is placing evenly sized dots. Starting with two colors and one dotting tool is enough.
What can I use if I do not have a nail dotting tool?
A toothpick, bobby pin or the end of a pen can work. A toothpick makes smaller dots and a pen end makes larger ones. Test the tool on paper first to check the size.
What colors look best with polka dot nails?
Any combination with enough contrast works. Black and white, nude and white, pink and red and blue and white are safe choices. If you want a softer look, use two shades of the same colour family.
Are polka dot nails suitable for short nails?
Yes, use smaller dots, fewer dots or put the design on one or two accent nails. Negative space designs also work well on short nails.
How do I make perfect dots on my nails?
Use only a small amount of polish on the tool, press straight down and lift straight up without dragging. Re-dip the tool regularly so each dot is the same size.
Can I combine polka dots with French tips?
Yes, Polka dots and French tips are a popular pairing. You can place dots along the tip, on the nail bed or on accent nails.
How can I make polka dot nail art last longer?
Use a base coat, thin layers of polish and a top coat that also covers the tips of your nails. Let every layer dry before the next one.
Final Thoughts
Polka dot nail art is easy to adapt. You can keep it quiet with tiny dots on a sheer base or go bold with bright colours and mixed sizes. Start with a simple design, pay attention to contrast and spacing, and let each layer dry. After a few tries, you will know which dot size, colour pairing and nail shape combination feels most like you.