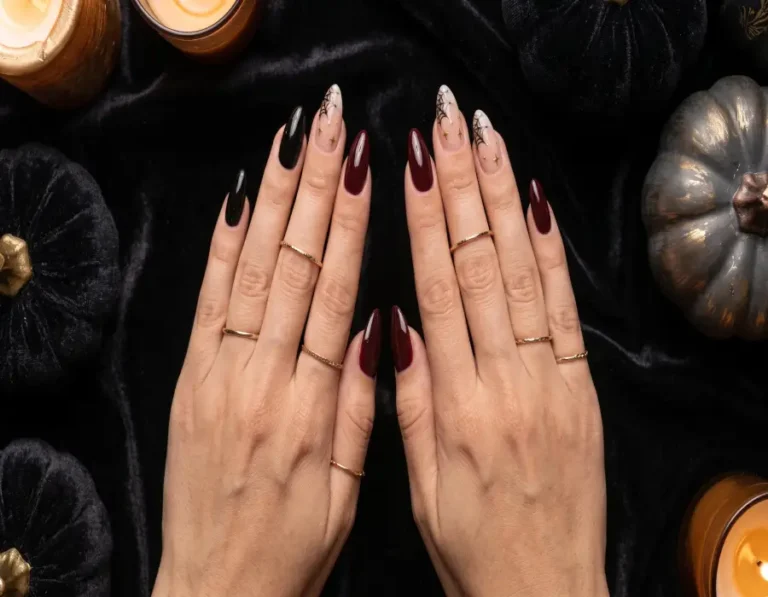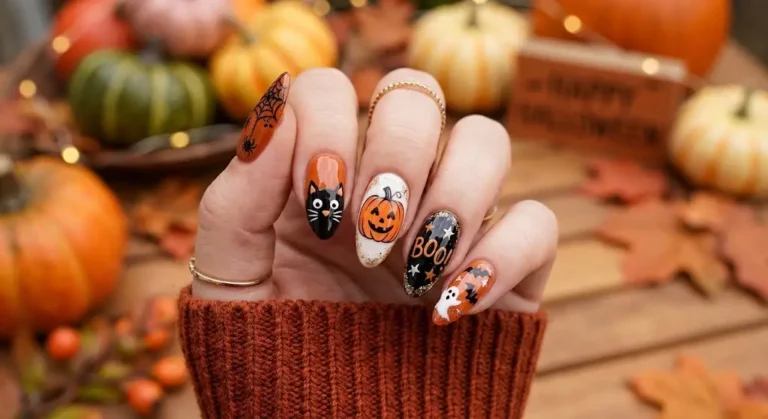
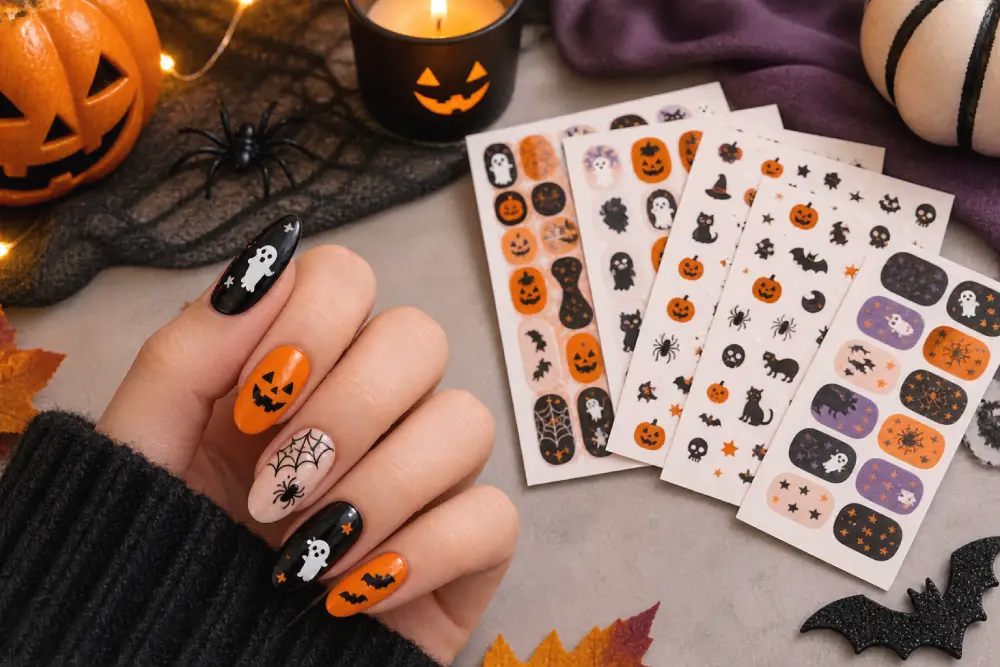
Stunning Halloween Nail Stickers: Simple Designs You Can Try at Home
It’s the night before a Halloween party. Your costume is ready, but your nails are bare, you have thirty minutes to spare, and there’s no chance you’re painting a tiny ghost freehand. This is exactly the kind of moment Halloween nail stickers were made for.
Stickers give you detailed seasonal artwork without brushes, dotting tools, or a steady hand. But a good result still depends on a few basics: picking the right type, choosing the right size, preparing your nails properly, and removing the stickers safely afterward. This guide walks through each step in plain language, so you can get a neat Halloween manicure even if it’s your first time.
What Are Halloween Nail Stickers?
Halloween nail stickers are pre-made nail decorations printed with seasonal designs such as ghosts, pumpkins, bats, spiders, spider webs, skulls, moons, and candy corn. You place them on your nails instead of painting the artwork yourself.
The term covers several different products, which is worth knowing before you buy. Some are tiny decals meant to sit on top of nail polish. Others are full-nail wraps that replace the polish entirely. A few are gel-style strips that need a lamp to finish. They look similar in a product photo, but they don’t all work the same way.
Why People Choose Nail Stickers Over Hand-Painted Designs
Hand-painted nail art looks impressive, but it needs practice, fine brushes, and time. Nail stickers remove most of that work because the design already exists.
The main advantages are:
- Speed: applying a set usually takes far less time than painting the same designs.
- Low skill barrier: you need patience and good placement more than artistic talent.
- Variety: you can try a dark, dramatic style one year and a cute, pastel one the next.
- Low commitment: you can add a single accent sticker to a manicure you already like.
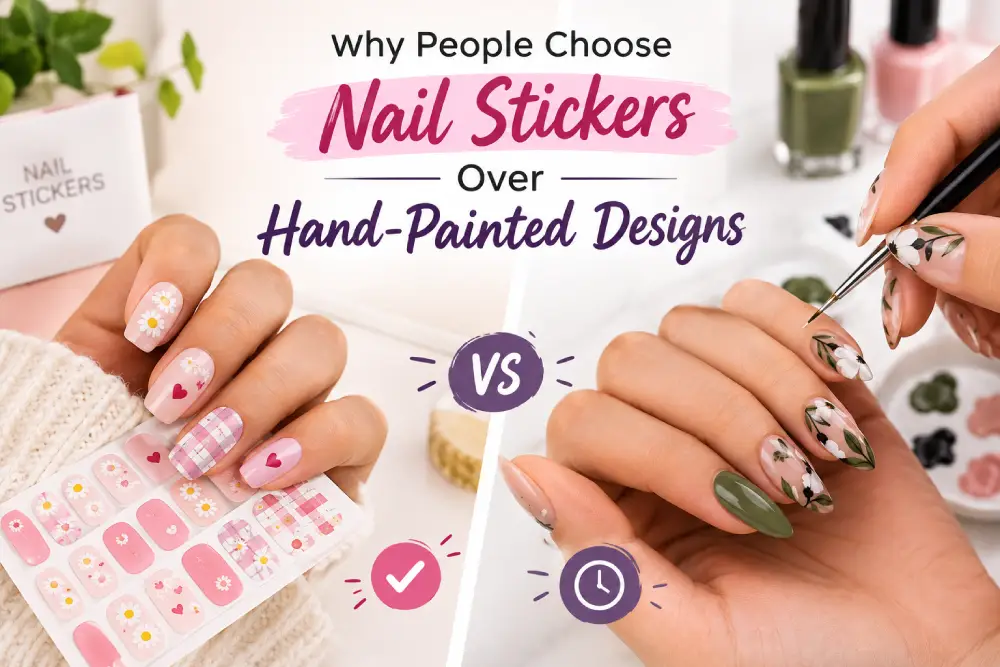
There are limits too. You can only use the designs on the sheet, so customisation is restricted. Sizes may not suit very small or very wide nails. And the quality varies between brands, which is why checking reviews and instructions matters.
Types of Halloween Nail Stickers
Knowing the type you’re buying helps you avoid disappointment. The table below compares the most common kinds.
| Type | Best for | Skill level | What to watch for |
| Small decals | Accent nails and adding details to your own polish | Beginner | Tiny pieces are easier to place with tweezers |
| Full-cover stickers or nail wraps | A complete design with no painting | Beginner | Choosing the correct size and trimming the excess |
| Water-slide decals | Fine, detailed artwork with a thin finish | Beginner to intermediate | Careful transfer, and usually a top coat |
| Gel-style strips | A glossy, gel-like finish | Intermediate | Often need a UV or LED lamp, and have their own removal steps |
Small Decals
Small decals are ideal for a first attempt. You choose a few nails, place a bat, ghost, or star on each, and leave the rest plain. If one sticker goes on crooked, you only need to fix one nail.
Full-Cover Stickers and Nail Wraps
These cover most or all of the nail. Because the background is already part of the design, you don’t need to paint anything. The main challenge is sizing. If the sticker is too wide, it will overlap the skin, and if it’s too narrow, you’ll see gaps at the sides.
Water-Slide Decals
Water-slide decals are soaked briefly in water, then slid onto the nail. They are often very thin, so the artwork can look as if it was painted on. They usually need a top coat to stay in place and stay protected, and they take a little more care to handle.
Gel-Style Strips
Some strips are semi-cured gel and finish under a lamp. Since the process differs from ordinary stickers, read the instructions carefully. Never assume a product without a lamp requirement behaves like one that needs curing, or the other way around.
How to Choose the Right Stickers
A sticker that looks great in a photo may not suit your nails. Think about these points before you buy.
Size and Nail Length
Scale matters more than most beginners expect. Short nails usually look neater with small designs, such as tiny ghosts, small pumpkins, single bats, or a corner spider web. Large illustrations can look crowded there. Longer nails have more room for bigger artwork and layered designs, but they don’t need to be complicated.
Look for sets that include several sizes on one sheet. That gives you a better chance of finding a match for each finger, especially your thumbs and little fingers, which are often very different in width.
Colour Contrast
Visibility depends on the background. White ghosts stand out on black, deep purple, or dark red. Black bats look sharp on nude or pale shades but can disappear on navy or charcoal. Orange pumpkins look best against black, cream, or neutral tones. Metallic gold or silver designs add a dressier finish on burgundy or dark green.
Instructions and Product Details
Good sets tell you how to apply and remove the stickers. If a listing doesn’t say whether the product is an adhesive sticker, a water-slide decal, or a gel strip, that’s a sign to look for a clearer alternative.
Skin and Nail Sensitivity
If you have sensitive skin or have reacted to nail products before, check the ingredients or materials when they’re listed. Stop using any product that causes redness, itching, or pain, and speak to a healthcare professional if the reaction continues.
Design Ideas to Try
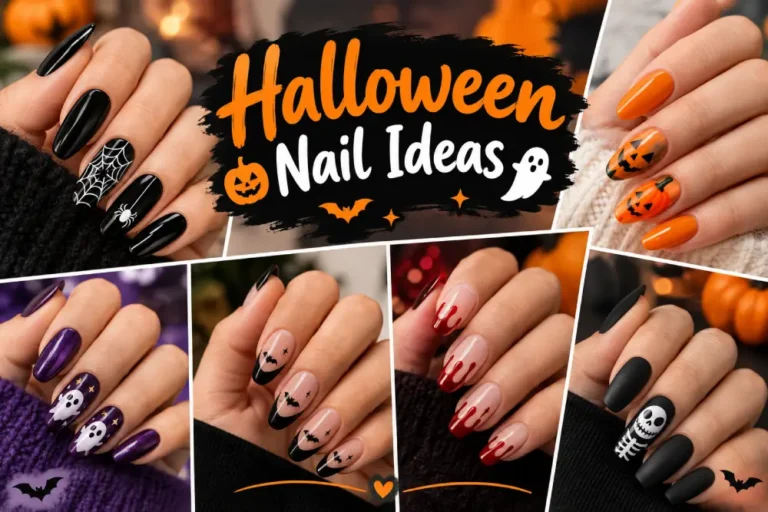
You don’t need a complicated look for it to feel like Halloween. These ideas suit different styles. For hand-painted versions of these designs, see our spooky Halloween nail art ideas.
Ghosts and Pumpkins
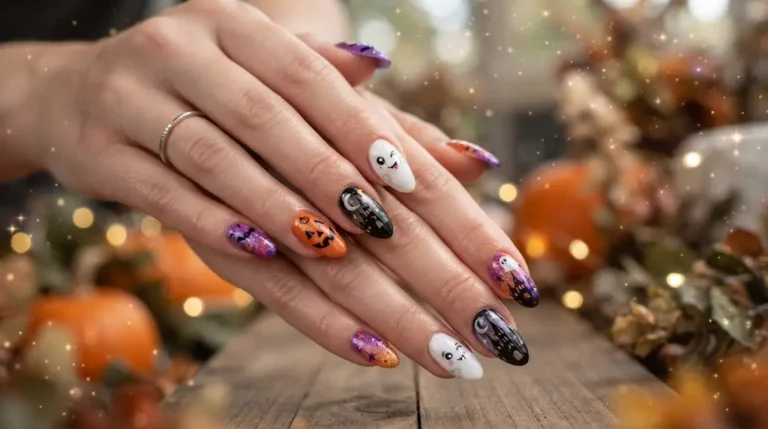
Ghosts are one of the easiest designs to wear because the shape is simple and recognisable. Put white ghosts on black, purple, or orange polish for a bold look, or use a few on a pale pink base for something softer. Pumpkins work as a classic choice on black, and mini pumpkins can act as accents on neutral nails. Adding tiny stars, moons, or leaves makes the design feel fuller without extra effort.
Spiders and Spider Webs
Spider-web stickers create a traditional spooky mood. One web in the corner of a nail can look elegant, while covering every nail can feel heavy. Leaving some nails plain gives the designs room to stand out.
Bats, Skulls and Cute Icons
Bats suit minimalist manicures. A few small black bats on a nude base give a Halloween feel that still works for everyday wear. Skulls give a stronger, darker look and pair well with black, burgundy, or metallic silver. For something lighter, try candy corn, smiling pumpkins, or small stars and moons.
Colour Combinations That Work
- Black and orange: the classic Halloween pairing.
- Black and white: clean, graphic, and minimalist.
- Purple and black: mysterious, especially with silver stars or moons.
- Nude and black: subtle enough for the office or school events.
- Burgundy and gold: elegant, and a good option if you don’t like bright orange.
A simple rule keeps things looking intentional: choose one main theme and one colour palette per manicure. Ghosts, skulls, pumpkins, and candy all together can feel messy.
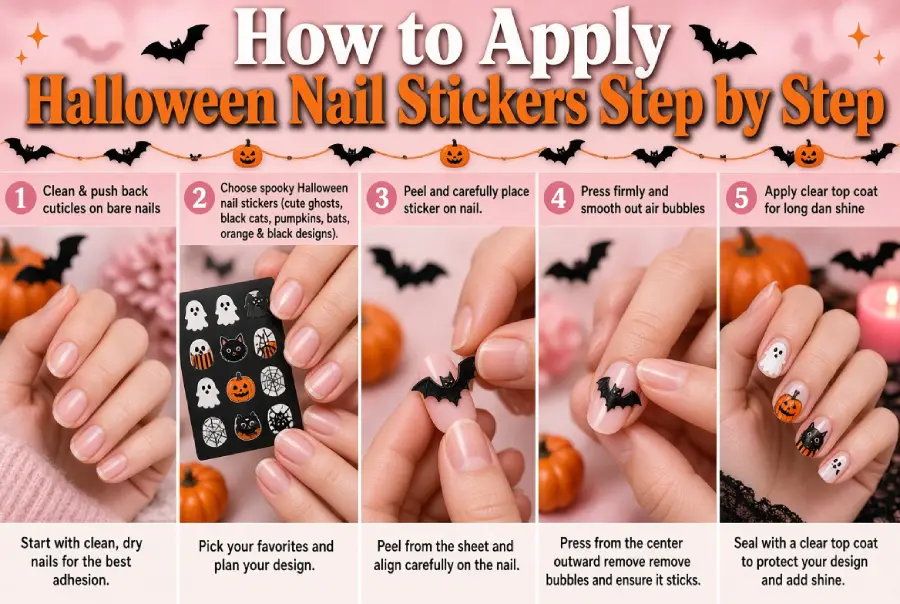
How to Apply Them Step by Step
Preparation decides how the manicure looks and how long it stays on. Always follow the instructions that come with your product, as methods differ. As a general guide for standard adhesive stickers:
- Clean your nails. Remove old polish and wash your hands. Oil, lotion, and moisture can stop adhesive from sticking well.
- Shape your nails first. Filing after applying stickers can damage the design.
- Check sizes before peeling. Hold the stickers over your nails and match each one. Choose the size that fits inside the nail without touching the skin.
- Apply base polish if you want one. Let it dry completely before applying ordinary stickers, unless the product says otherwise.
- Peel carefully. Tweezers give more control than fingers and help keep the adhesive clean.
- Place near the cuticle, not on it. Leaving a very small gap helps prevent lifting.
- Smooth from the centre outward. This pushes out air bubbles.
- Press the edges. The sides and the tip are the areas most likely to lift first.
- Trim or file the excess. File gently downward from the tip toward the nail, so the edge doesn’t catch and peel.
- Seal if the product allows. Some products recommend a compatible top coat, while others don’t. Check first.
Practical Tips for a Neater Finish
- Work on one hand at a time and lay out the stickers you plan to use before you start.
- If a sticker is slightly too wide, choose a smaller one instead of stretching it.
- Use a cuticle pusher or an orange stick to press edges without leaving fingerprints.
- If you’re using a lamp-cured product, apply thin layers and follow the curing times exactly.
- For a natural look, apply stickers to two or three accent nails, and leave the rest simple.
Common Mistakes to Avoid
Most problems come from the same few causes:
- Choosing a sticker that’s too big. It overlaps the skin and lifts quickly.
- Applying over wet or soft polish. The sticker can slide or leave an uneven surface.
- Pressing down too soon. Some adhesives grab immediately, so position first.
- Ignoring the free edge. Unsealed tips catch on clothes and hair.
- Skipping preparation. Oily nails are a common reason stickers won’t hold.
- Ripping them off. Pulling can damage the nail surface. More on this below.
How to Make Them Last Longer
No product can promise the same wear time for everyone. How long a manicure lasts depends on the type of sticker, your nail preparation, and your daily activities.
These habits help:
- Start with clean, dry, oil-free nails.
- Keep stickers off the surrounding skin.
- Press the edges down firmly.
- Use a compatible top coat if the instructions allow it.
- Wear gloves for washing dishes or cleaning.
- Avoid using your nails as tools to scrape, open cans, or pick at things.
If you see a corner lifting, press it back down early. Picking at it usually makes it worse.
How to Remove Them Safely
Removal is just as important as application. The safest rule is to soften first and remove gently second.
Depending on the product, removal may involve nail polish remover, acetone, warm water, oil, or a special remover. Follow the instructions for your specific sticker.
A general approach for stickers applied over polish:
- If you added top coat, lightly buff the surface so the remover can reach the sticker.
- Soak a cotton pad in the recommended remover and hold it on the nail for a minute or two.
- Gently slide the softened sticker off with a cuticle stick.
- If it resists, soak again rather than pulling harder.
Afterward, wash your hands and apply cuticle oil or hand cream. If your nails feel weak, sore, or irritated, take a break from nail products until they recover.
Stickers vs Hand-Painted Nail Art
Both approaches have their place. The comparison below shows how they differ.
| Feature | Halloween nail stickers | Hand-painted nail art |
| Skill needed | Very little | Practice and a steady hand |
| Time | Usually faster | Often longer |
| Customisation | Limited to available designs | Highly flexible |
| Tools | Tweezers and possibly a top coat | Brushes, dotting tools, several polishes |
| Best for | Quick seasonal looks | Custom, one-of-a-kind designs |
You don’t have to choose one. A popular compromise is to use solid polish, add stickers to two or three nails, and finish with a few dots or lines using a small nail brush.
Where to Buy Them
You’ll find nail stickers at beauty stores, supermarkets, pharmacies, and online marketplaces, and Halloween ranges usually appear in the weeks before October. When comparing options, look at:
- What type of product it is (adhesive, water-slide, or gel strip)
- How many sizes are included
- Whether the instructions are clear
- Customer photos, not only product images
- The return policy, in case the sizes don’t fit
Prices and availability change by store and season, so compare a few sellers before you buy.
Conclusion
Halloween nail stickers are one of the easiest ways to add a seasonal touch to your manicure. You don’t need advanced skills, but you do need to choose the right type, match the sizes carefully, prepare your nails properly, and remove the stickers gently.
If you’re a beginner, start small. Pick a set with several sizes, try one theme and a simple colour palette, and add stickers to just a few nails. Once you’re comfortable, you can experiment with bolder combinations or mix stickers with hand-painted details. Treat your nails kindly, and they’ll be ready for the next design.
FAQs
Are Halloween nail stickers good for beginners?
Yes, the artwork is already done, so you mainly need to focus on choosing the right size, placing the sticker neatly, and smoothing the edges. Starting with small decals on a few nails is a low-pressure way to learn.
Can you use Halloween nail stickers on short nails?
Yes, smaller designs such as tiny ghosts, bats, stars, and mini pumpkins usually fit short nails better than large illustrations. Look for sets with multiple sizes.
Do you need a top coat over nail stickers?
It depends on the product. Some stickers and water-slide decals benefit from a compatible top coat, while other products have different finishing steps. Check the manufacturer’s instructions before applying one.
Can you put nail stickers over regular nail polish?
In many cases, yes, as long as the polish is completely dry. Wet or soft polish can cause the sticker to move or leave an uneven finish. Always check the product instructions.
How long do Halloween nail stickers last?
There isn’t one answer. Wear time depends on the type of sticker, the quality of the product, how well the nails were prepared, and how much you use your hands. Check the packaging for the manufacturer’s guidance, and treat it as an estimate.
Why do my nail stickers keep peeling?
The most common reasons are oily or damp nails, stickers that are too large, edges that weren’t pressed down, and heavy contact with water. Better preparation and a properly sized sticker usually help.
How do you remove nail stickers without damaging your nails?
Use the removal method recommended for your product, soften the sticker first, and slide it off gently. Avoid scraping or ripping it away. Moisturise your nails and cuticles afterward.
Are Halloween nail stickers safe for sensitive skin?
It depends on the product and the person. Check the materials and ingredients if they’re listed, and stop using a product that irritates your skin. If a reaction continues, speak to a healthcare professional.