How to Apply Press-On Nails That Last 2 Weeks (Step-by-Step)
You paid for a gorgeous set, pressed it on in a hurry, and by the next afternoon your ring finger nail had popped off in the supermarket queue. It’s a common story, and it almost never means the nails were bad. Most of the time, the problem is in the 10 minutes before the first nail touches your hand.
This guide covers how to apply press on nails properly, from prep to removal, using either adhesive tabs or nail glue. You’ll also find fixes for oily nail beds, flat nail beds, and air bubbles, plus a quick-swap method for anyone who needs to take their nails off every day. With careful prep and the right adhesive, a glue set can stay on for up to 2 weeks. Tabs wear for a shorter time, but they are gentler and easier to change.
The Quick Answer: How to Apply Press-On Nails in 7 Steps
If you only need the short version of how to apply press on nails, here it is. The rest of the article explains each step and why it matters.
- Wash your hands well with soap, then dry them fully.
- Trim your natural nails short, push back the cuticles, and lightly buff the shine off each nail.
- Wipe every nail with isopropyl alcohol to remove oil.
- Match a press-on size to each finger, going slightly smaller if you fall between sizes.
- Apply your adhesive (a tab, or a thin layer of glue on both surfaces).
- Set the base of the press-on near the cuticle first, then roll it down and hold for 20 to 30 seconds.
- Avoid water for at least an hour, and keep hands gentle for the first night.
What You Need Before You Start
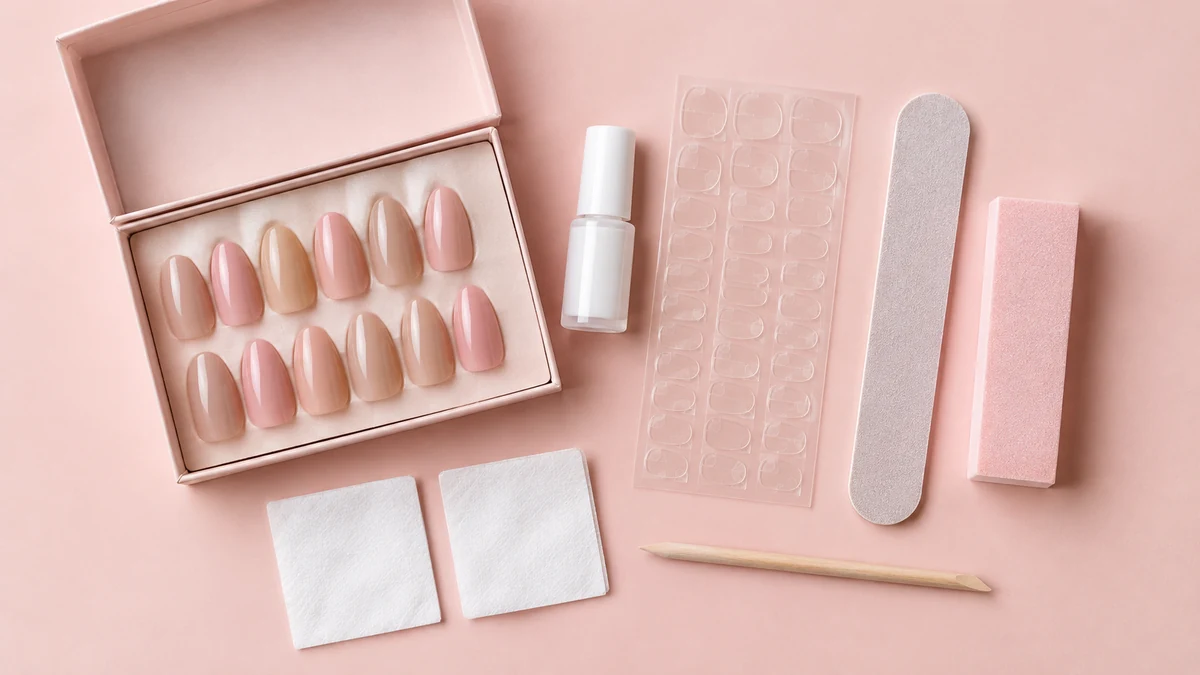
Before you learn how to apply press on nails, lay everything out, because glue sets fast and you won’t want to go hunting for a nail file with adhesive on your fingers.
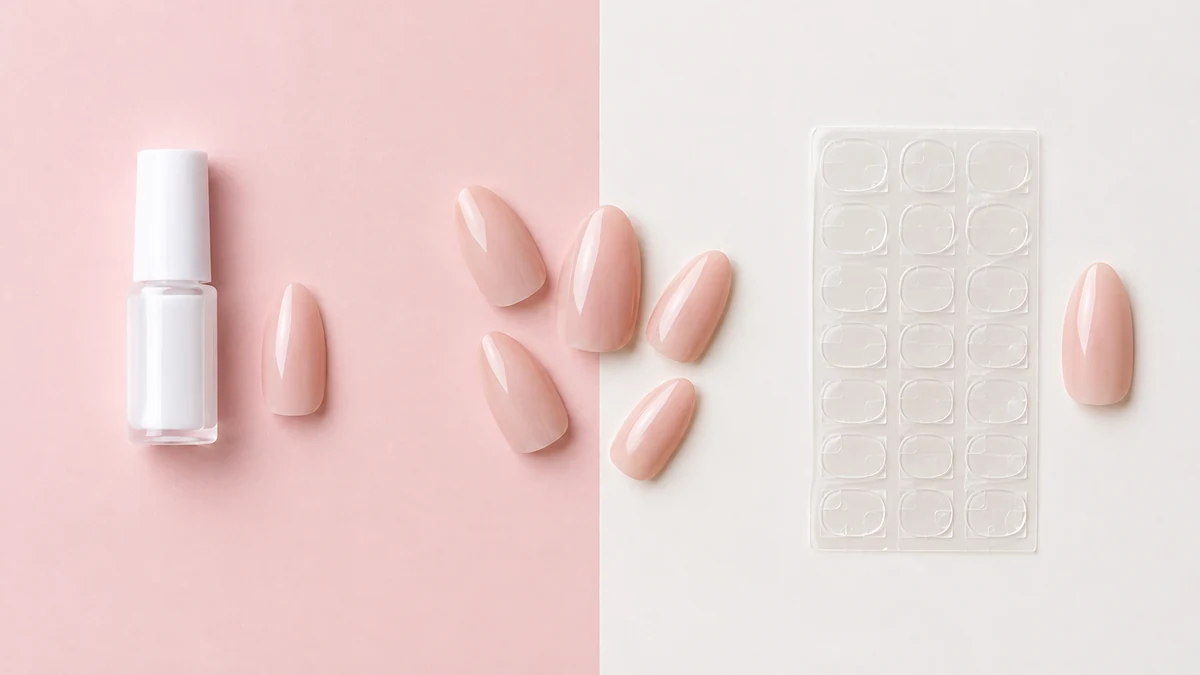
- A press-on nail set with several sizes
- Nail glue or adhesive tabs (or both, for the hybrid method)
- Isopropyl alcohol and lint-free wipes or cotton pads
- A cuticle pusher or orange stick
- A fine-grit nail file and a buffer block
- Nail clippers
- A nail dehydrator or primer (optional, but useful for oily nails)
- Cuticle oil for afterwards
- A small piece of paper or a plate to place your nails on in order
Lay your nails out in sizing order before you begin. It saves time and prevents mix-ups once your hands are sticky.
Step 1: Prep Your Natural Nails
Prep decides how long your set lasts. Press-ons grip the surface of your nail, so anything sitting between the adhesive and your nail plate, whether that is oil, lotion, old polish, or dead skin, works against you.
Wash and Dry Your Hands
Wash with warm water and plain soap, then dry your hands thoroughly. Hand cream, cuticle oil, and the natural oils on your fingertips are some of the biggest reasons sets lift early, so skip moisturiser until after the application.
Trim and Shape Your Natural Nails
Trim your natural nails down short, ideally a little shorter than the press-ons you plan to wear. Long natural nails can stick out beneath the press-on, snag on things, and put extra leverage on the glue bond. Remove any old polish before you start.
Push Back Your Cuticles
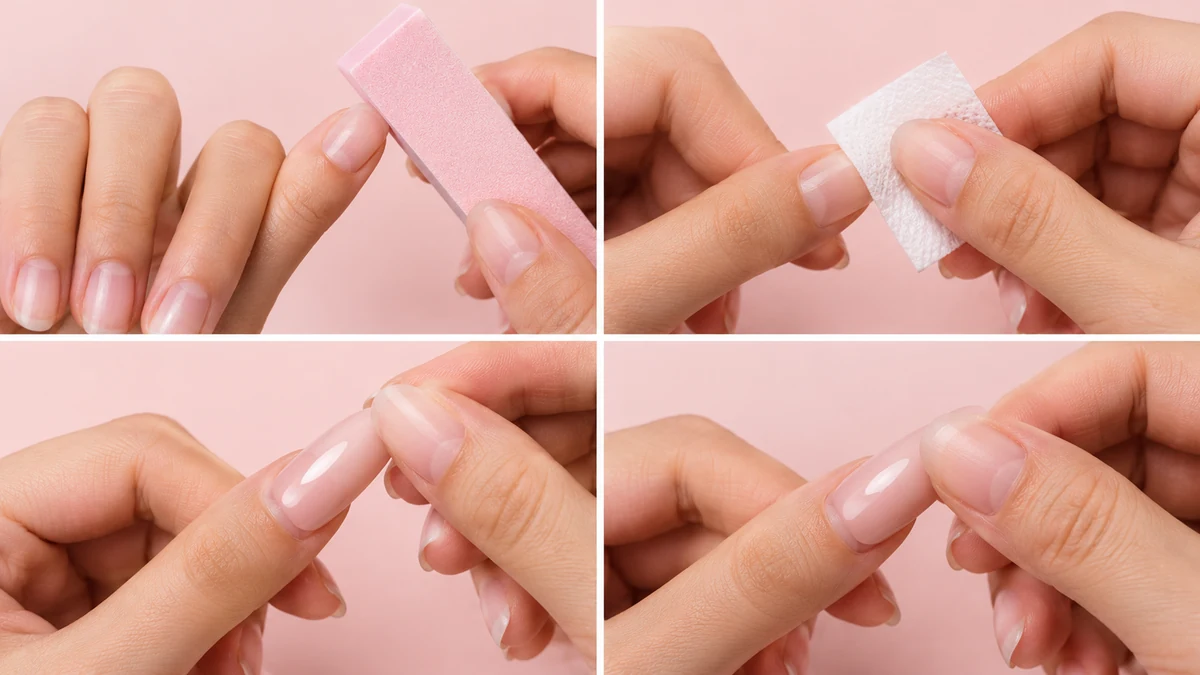
Use a cuticle pusher or orange stick to ease your cuticles back gently. The goal is a clean nail plate with no skin or thin cuticle film stuck to it. Do not cut live cuticle skin, and do not push hard enough to cause pain.
Lightly Buff the Shine
Use a buffer block with a few light passes to take the glossy shine off the nail surface. The goal is not to thin the nail, only to take the shine down a little so the adhesive has something to grip. Brush away the dust afterwards.
Dehydrate With Alcohol
Swipe every nail with an alcohol pad or a lint-free wipe dampened with isopropyl alcohol, going over the sides and just under the free edge too. After this step, avoid touching the nail surface with your fingers. Even a quick touch can leave oil behind.
Do You Have Oily Nails? Try This Protocol
Some people do everything right and still watch their nails lift. If your nail beds tend to be oily or your hands feel greasy even after washing, add a few extra steps.
- Double wipe with alcohol. Wipe each nail once, let it dry for a few seconds, then wipe again with a fresh pad.
- Use a nail dehydrator. This is a prep liquid made to remove surface moisture and oil before adhesive goes on. Follow the instructions on the bottle.
- Consider an acetone-based wipe. A quick wipe with an acetone-based nail polish remover can strip stubborn oil. Use it sparingly and moisturise afterwards, because acetone is drying.
- Add a primer if you need extra grip. A nail primer made for artificial nails can improve adhesion on difficult nail beds. Read the label first, and keep it off your skin.
Oily nails respond best to nail glue rather than tabs, since glue creates a stronger bond with a well-prepped surface.
Step 2: Size Your Press-On Nails Correctly
Wrong sizing is one of the most common reasons press-ons lift, because a nail that is too wide or too narrow cannot sit flat against your natural nail.
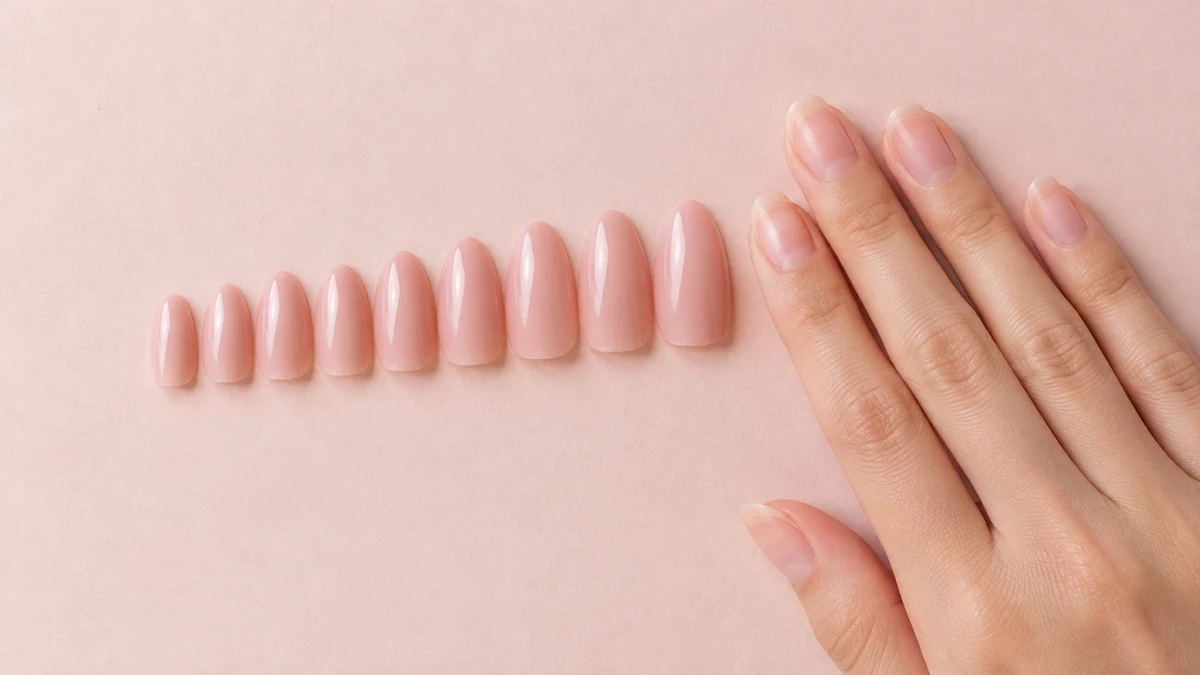
Here is how to size them well:
- Hold each press-on against your natural nail and check the width from side wall to side wall.
- The press-on should cover your nail from edge to edge without overlapping onto the skin.
- If you fall between two sizes, choose the smaller one. A slightly narrow nail looks tidy. An oversized one catches and pops off.
- Do not let the press-on touch the skin around the nail, because that area flexes constantly and breaks the bond.
- Make a note of which size you use for each finger, since your hands are rarely identical.
You can gently file the sides of a press-on that is a touch too wide, but do not rely on filing to fix a nail that is clearly the wrong size.
Adhesive Tabs vs Nail Glue: Which Should You Use?
Both methods work. They simply suit different situations.
| Feature | Adhesive Tabs | Nail Glue |
|---|---|---|
| Typical wear time | Roughly 1 to 7 days, depending on the product and your habits | Up to about 2 weeks with good prep |
| Removal | Soak in warm soapy water, then slide off gently | Needs a longer soak and patience |
| Nail damage risk | Lower, as long as you never pull them off dry | Higher if you pry or rush removal |
| Reuse | Easiest to reuse, since less residue is left behind | Reusable a few times with careful removal |
| Best for | Beginners, daily swaps, short events, frequent design changes | Weddings, holidays, busy weeks, and active hands |
Brands package their own tabs and glue, so wear time varies. If you use a branded kit, read its instructions first. OPI publishes details about its press-on range on the official OPI website, and Glamnetic shares application guidance for its sets on the official Glamnetic website.
My personal preference is tabs for anyone new to press-ons or anyone who likes to change designs often, and glue for events and holidays where a nail popping off would be a real nuisance.
How to Apply Press-On Nails With Adhesive Tabs (Beginner Method)
Tabs are forgiving, which is why they are a great first step. They are also less messy than glue.
- Prep and size. Complete the prep and sizing steps above.
- Choose the right tab. Match the tab to the shape of your press-on, and trim it if it extends past the edge.
- Stick the tab to your natural nail first. Many people find placement easier this way. Press it flat and smooth out any wrinkles. Some brands instead say to stick the tab on the press-on, so follow the product’s instructions where they differ.
- Remove the backing and set the nail. Place the base of the press-on close to the cuticle, then lower the rest of the nail down.
- Press firmly and hold. Hold for about 20 to 30 seconds, applying pressure from the centre outwards to the sides.
- Go thumb last. Thumbs are the widest and trickiest nails, so finish with them once you feel confident.
Tab sets are quick to remove, which makes them ideal for trying a new colour or shape without a long commitment. For Y2K-inspired designs like chrome French tips and butterfly art, see our Y2K nails guide.
How to Apply Press-On Nails With Nail Glue (Up to 2 Weeks)
This is the method for the longest wear. It takes a little more care, but the results are worth it.
Step 1: Apply a Thin Layer of Glue to Both Surfaces
Place a small amount of glue on your natural nail and spread it thinly, then add a thin layer to the underside of the press-on. Too much glue is a common mistake. It squeezes out at the sides, pools at the cuticle, and can glue the nail to your skin.
Step 2: Set the Base First, Then Roll Down
Position the base of the press-on about 0.5 mm short of your cuticle, then lower the nail towards the tip in one slow movement. Starting from the base and rolling forward pushes air out toward the free edge. Dropping the nail tip-first tends to trap air under the centre, and that creates weak spots and bubbles.
Placing the nail at roughly a 45-degree angle as you lower it helps the glue spread evenly instead of pooling.
Step 3: Press and Hold
Press firmly from the centre outwards and hold for 20 to 30 seconds. Count it out, because it feels longer than you expect. A proper hold is what lets the bond set.
Step 4: Check for Air Bubbles Straight Away
Look at the nail from the side and at the surface. A bubble or a clear patch usually means there was not enough glue in that area. Do not leave it and hope for the best. Lift the nail while the glue is still workable, add a little more glue, and press again. Fixing it in the first few seconds takes a lot less effort than redoing a lifted nail later.
Step 5: Clean Up Excess Glue
If any glue has squeezed out around the edges, wipe it away quickly with a cuticle stick or a clean tool before it hardens. Do not rub hardened glue off your skin. Soak it in warm soapy water until it loosens.
Never Use Super Glue on Your Nails
It might look similar, but super glue is not designed for use on nails or skin. It can bond skin instantly, irritate the area, and make safe removal much harder. Use a glue sold specifically for nails. If glue ever gets near your eyes, rinse with water and get medical help.
Pro Tip: File the Underside of the Press-On for Extra Grip
Some press-on nails have a smooth, slightly glossy underside. If your nails keep lifting, try this before applying glue:
- Take a fine-grit file and lightly rough the underside of the press-on, especially the area that will sit over the middle of your natural nail.
- Brush off the dust with a clean brush or wipe.
- Avoid filing so hard that you thin the plastic or scratch through to the top.
The rough surface gives the adhesive something to grip, much like preparing your natural nail.
The Hybrid Method: A Dot of Glue Under an Adhesive Tab
If you want something stronger than tabs but easier to remove than a full glue application, this middle route is worth trying.
- Apply the adhesive tab to your natural nail as usual.
- Add a very small dot of glue near the base of the press-on, not across the whole nail.
- Set the nail from the base and roll it down, then hold for 20 to 30 seconds.
The hybrid method typically gives somewhere around 5 to 7 days of wear and is easier to remove than a full glue application. It is a good option for a long weekend, a trip, or a busy work week.
What If Your Nail Bed Is Flat or Curved?
Natural nails come in different shapes, and press-ons are sold in a standard curve. If yours do not match, you may notice gaps at the sides or lifting at the centre.
- Flat nail beds: Choose a slightly narrower size and use a little more glue near the sides. A press-on with a flatter curve can also help. Press from the centre outwards.
- Very curved nail beds: Check the side walls carefully. If the press-on is too flat for your curve, the edges can lift and pop. Pinch the sides lightly while the glue sets so the nail follows your shape.
- Uneven nail beds: Mix sizes finger by finger, and never force a nail that will not sit properly.
If a nail stays raised after a hold, remove it, check the fit, and try the next size down before using more glue.
After Application: Shape, Protect, and Settle
File and Shape if Needed
Once all ten nails are on, you can file them if you want a different length or shape. File gently, using short strokes in one direction. Avoid sawing across the nail, since heat and pressure can loosen the bond.
The First Hour Rule
Stay out of water for at least the first hour. The adhesive is still setting during this time, and moisture weakens it.
Apply in the Evening and Respect the First Night
Applying your nails in the evening works well, because you are less likely to be washing dishes or doing chores afterwards. Keep your hands dry overnight and avoid tasks that put pressure on your nails. By morning, the bond should be much more settled.
Quick-Swap Nails for Daily Wear (Including Wudu-Friendly Routines)
Some women need to take their nails off every day, for example, before wudu or before cleaning and cooking. If that is you, tabs are usually the more practical choice, because they remove with a gentle soak rather than long soaking and prying.

Here is a gentle daily routine:
- Use tabs, not glue. Choose reusable tabs designed for short wear.
- Keep your natural nails short and clean. This makes each application faster and reduces trapped moisture.
- Remove gently each day. Soak your fingertips in warm soapy water for a few minutes, then slide the nail off from the side. Never pull the nail dry.
- Dry your hands and nails fully. Let them air dry before you put your nails back on.
- Check the tab and the nail. Replace tabs that have lost their stick. Reusing a worn tab leads to lifting.
Rules about what is required for wudu are a personal matter, so if you are unsure, ask a scholar or teacher you trust. What matters for the nail routine is that tabs make daily removal realistic without damaging your nails.
How to Make Your Press-On Nails Last Longer
Good prep does most of the work. Once you know how to apply press on nails, these habits do the rest:
- Use your fingertips, not your nails, to open cans, peel labels, or scratch surfaces.
- Wear gloves when washing dishes or cleaning.
- Keep hands dry for the first hour, and limit long soaks on the first day.
- Apply cuticle oil around the nail, not under it.
- File gently if you need to adjust a length.
Mistakes That Make Press-Ons Pop Off in a Day
If your nails keep coming off early, check this list:
- Wrong size. Too wide or too narrow means constant stress on the edges.
- Skipping dehydration. Oil under the nail is the quickest way to lose your set.
- Touching your skin. If the press-on sits on the skin or the glue touches it, the bond breaks as your skin moves.
- Using too much glue. Excess glue pools and makes a messy, weaker bond.
- Getting wet too soon. Water within the first hour weakens the glue.
- Prying nails off. Forcing nails off can tear layers from your natural nail.
- Ignoring cuticle prep. Leftover cuticle film prevents proper adhesion.
Removing Press-On Nails Without Damaging Your Natural Nails
Patience is the secret. Pulling a nail off dry can peel away the top layers of your natural nail, and that is where most damage comes from.
- Fill a bowl with warm soapy water and soak your fingertips in it for 10 to 15 minutes. Adding a little cuticle oil or baby oil can help the adhesive soften.
- Gently test each nail at the side. If it lifts easily, slide it off. If not, soak again.
- For glue, you can use a pop-off nail remover made for press-ons, following the instructions on the product.
- Wipe away any leftover residue gently, and never scrape at it.
If you also wear other nail enhancements and want to understand safe soaking in general, read our guide on how to remove gel nails at home, which explains soaking techniques that protect your natural nails.
Can You Reuse Press-On Nails?
Yes, in many cases. Tabs make reuse easiest, since there is less residue to clean off. With glue, you can often reuse a set a few times if you remove the nails carefully and clean the underside gently.
To reuse a set:
- Remove old adhesive from the underside using a soft nail file or wipe.
- Check that the shape has not warped.
- Store the nails in their original box, in order, so they stay flat.
Nails with cracks or warped edges are better discarded.
Between-Sets Nail Care and Rest
Your natural nails still need care, even when they are covered. After removing a set:
- Wash your hands and apply cuticle oil to the nail and skin around it.
- Use a strengthening base coat if your nails feel soft or thin.
- Give your nails a few days of rest between sets if they feel weak, dry, or sensitive.
If you catch a snag or a split while your nails are bare, our guide on how to fix a broken nail at home without glue shows what you can do. And if your natural nails often feel weak, you might want to compare strengthening options in rubber base vs builder gel before your next manicure. Looking after your natural nails between sets is part of how to apply press on nails successfully in the long run.
Frequently Asked Questions
How long do press-on nails last with glue?
With good prep and glue, press-ons typically last up to 2 weeks. Exact timing depends on the adhesive, how active your hands are, and the brand’s instructions.
How long do press-ons last with adhesive tabs?
Tabs usually last anywhere from a day to a week, depending on the product and your daily habits. Follow the guidance on how to apply press-on nails with tabs above, and choose tabs when you want a shorter, more flexible wear time or a daily swap.
What is better, nail glue or adhesive tabs?
Neither is better for everyone. Glue suits longer wear and busy hands. Tabs suit beginners, frequent changes, and gentler removal. Think about your week as much as your nails. Whichever you choose, learning how to apply press on nails well still comes down to careful prep and correct sizing.
Can you shower with press-on nails?
A quick shower is usually fine once the adhesive has fully set. Try to avoid very long hot soaks on the first day, and dry your hands and nails afterwards.
Why do my press-on nails keep popping off?
The most common causes are the wrong size, oily nail beds, skipping the dehydration step, or getting your nails wet too soon. Work through the mistakes list above and try again.
Can you reuse press-on nails?
Often, yes. Tabs make reuse easiest, because there is less residue to clean. Glue sets can often be reused a few times after careful removal and a gentle clean of the underside.
Do press-on nails damage your natural nails?
Damage usually comes from pulling nails off dry or scraping at residue, not from wearing the nails themselves. Soak them off, take your time, and give your nails oil and rest between sets.
How do you remove press-on nails safely?
Soak your fingertips in warm soapy water for 10 to 15 minutes, then lift each nail gently from the side. If a nail is still stuck, soak it again rather than forcing it.
Conclusion
Learning how to apply press on nails comes down to three things: preparation, sizing, and patience. Wash and dry your hands, prep your nails, match each size carefully, and press firmly from the base. Choose tabs for flexibility and glue for staying power, and remove them gently when you’re done. With these steps, you can enjoy a salon-style set at home without the stress of nails popping off. Now that you know how to apply press on nails properly, your next set should stay put.