Halloween Black Nails: 30 Stunning Ideas, Shapes and Easy DIY Tips for 2026
Costumes change every year, but a black manicure almost never looks out of place on Halloween. It works with a witch hat, a vampire cape, a simple black dress, or just a hoodie and jeans. That is exactly why Halloween black nails are such a popular choice: they feel festive without asking you to commit to a full set of pumpkins and ghosts.
If you are searching for ideas, you will find hundreds of photos online, but very few explain what actually suits short nails, what is easy to do at home, or how to stop black polish from looking streaky. This guide to Halloween black nails covers all of that. You will find 30 black Halloween nail ideas, the best nail shapes, the difference between matte and glossy finishes, a simple DIY method, and answers to common questions.
About This Guide
This guide is published by Openpathstyle, a lifestyle, skin and beauty site, for readers in the US and UK who want practical Halloween manicure ideas. The designs are general inspiration, not professional nail advice. Drying time, wear time and removal steps vary by product, so always follow the instructions on your own polish, gel or press-ons. If you have sensitive skin or a nail condition, check with a professional before trying new products.
Quick Picks: Where to Start With Halloween Black Nails
- Easiest look: a solid glossy or matte black manicure with one small accent nail.
- Best for short nails: a black micro French tip or a tiny spiderweb on one finger.
- Best for work or everyday wear: matte black with no extra art.
- Most dramatic: black stiletto or coffin nails with blood drips or 3D charms.
Why Halloween Black Nails Work So Well
Black is the base color of most Halloween imagery, from bats and black cats to witches’ hats and spiderwebs. Because it is so closely linked to the season, even a plain black manicure reads as “Halloween” in October, yet it still looks like a normal manicure in November.
Halloween black nails are also a strong background for other colors. Orange, white, red and silver all stand out clearly against black, so you can add as much or as little detail as you like. And since black goes with nearly every outfit, you do not need to plan your nails around a specific costume.
How to Choose the Right Black Polish
The best black polish is one that covers well in two thin coats, so check the formula before you buy. A few differences are worth knowing before you start.
Opaque vs Sheer Black
An opaque black gives full, solid coverage. It suits most designs, especially if you plan to paint white or colored details on top. A sheer or jelly black is more see-through, so it looks softer and can let a hint of your natural nail or a base color show through. It is a good choice for a relaxed look, but not if you want a deep, true black.
Regular Polish vs Gel
Regular polish air-dries, costs less and is easy to remove, which makes it a good place to start. Gel polish is cured under an LED or UV lamp, usually has a glossy finish and often lasts longer, but it needs a lamp and a more careful removal. Whichever you choose, follow the instructions on the product.
Glossy vs Matte Finish
| Finish | Look | Good to know |
|---|---|---|
| Glossy | Shiny, reflective and bold | Shows nail art clearly, but can show small bumps |
| Matte | Soft, velvety and modern | Can show marks from skin oils, so check it in daylight |
30 Halloween Black Nails to Try This Year
The Halloween black nails below are grouped by style, from simple to dramatic. Pick one that matches your nail length and your comfort level with nail art.
Simple and Minimal Halloween Black Nails
These are the easiest designs to do at home, and the most wearable if you do not want obvious Halloween art.
- Glossy black. A classic, shiny black manicure. It is quick, and it looks sharp on any nail shape.
- Matte black. A matte top coat gives black a soft, velvety look. It feels modern and a little moody.
- Black micro French. A very thin black line at the tip of a nude or sheer base. It suits short nails especially well.
- Black with one accent nail. Paint every nail black, then add a tiny star, moon or bat on the ring finger.
- Black with a glossy design on matte. Use a matte base and paint a simple shape, such as a web or dots, in glossy clear or black polish for subtle contrast.
Black French Tip Halloween Nails
French tips are a good middle ground if you want something more interesting than solid black.
- Black tips on a nude base. Clean and neat, and easy to wear beyond Halloween night.
- Black tips with a spiderweb accent. Keep the web small and place it on one or two nails so the look does not feel crowded.
- Black and blood-red double French. Add a thin red line under the black tip for a dramatic but still tidy finish.
- Reverse French. Paint the black curve at the cuticle instead of the tip for an unexpected twist.
Spooky Nail Art for Halloween Black Nails
These designs bring in classic Halloween symbols. A fine nail art brush or a dotting tool makes them much easier.
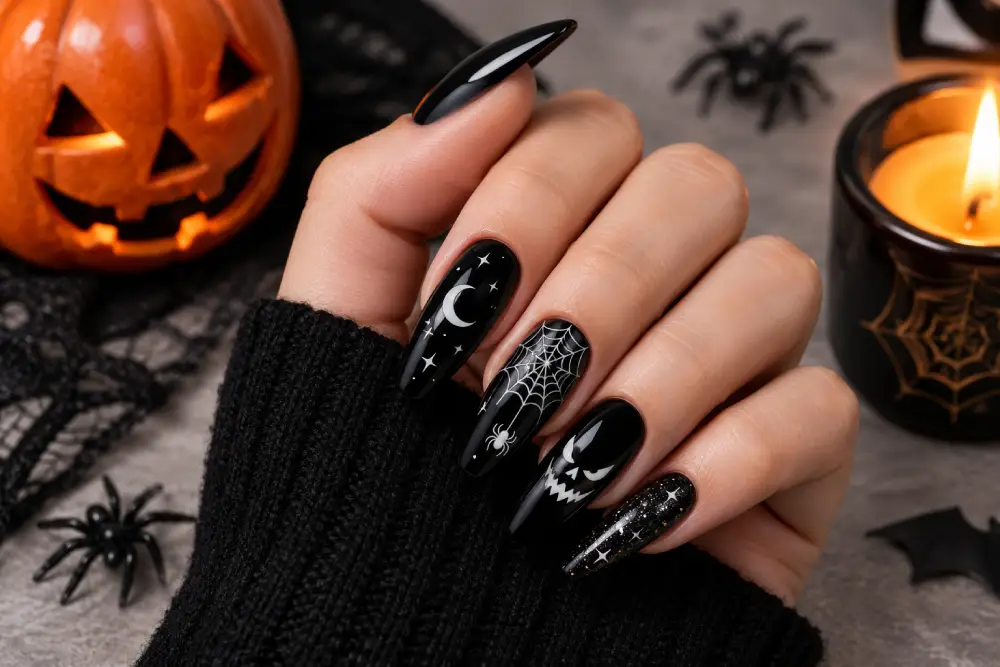
- Spiderwebs. White or silver lines on a black base are the most recognizable Halloween nail design.
- Skeleton bones. White finger-bone shapes down each nail on a black background. Simple versions use just a few lines.
- Bats. Small black bats on a nude or gray base, or tiny white bats on black.
- Black cats. A cat silhouette on a light nail, or a pair of bright eyes peeking out from a black nail.
- Blood drips. Red drips running down from the tip. A glossy top coat over the red makes it look wet.
- Little ghosts. White ghost shapes with two black dots for eyes. They look cute rather than creepy.
- Skulls. A small skull on an accent nail is easier than painting a skull on every finger.
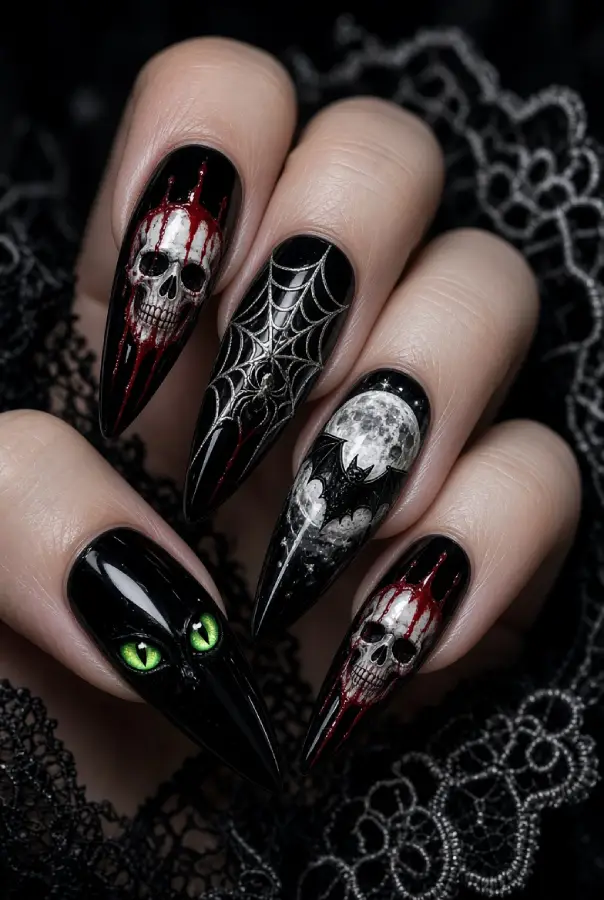
Glam and Chrome Black Halloween Nails
If you want something less cartoonish and more polished, these are good options.
- Black chrome. A mirror-like finish that reflects light. It is usually done with chrome powder or a chrome-effect polish.
- Black glitter ombré. Glitter that fades up from the tips into black.
- Black and gold. Thin gold lines, foil flakes or a single gold accent nail.
- Black and silver stars. Tiny silver stars or moons for a night-sky effect.
- Cat-eye black. Magnetic polish creates a shimmering line across the nail that shifts as your hand moves.
- Black with rhinestones or 3D charms. Spiders, small skulls or crystals add texture. Use them sparingly so they are comfortable to wear.
Black Halloween Nails with Color
Black looks great paired with one extra shade.
- Black and orange. Orange French tips or one small pumpkin on a black base.
- Black and purple. A deep purple accent nail gives a witchy feel.
- Black and red. Red details such as lips, hearts or drips for a vampire look.
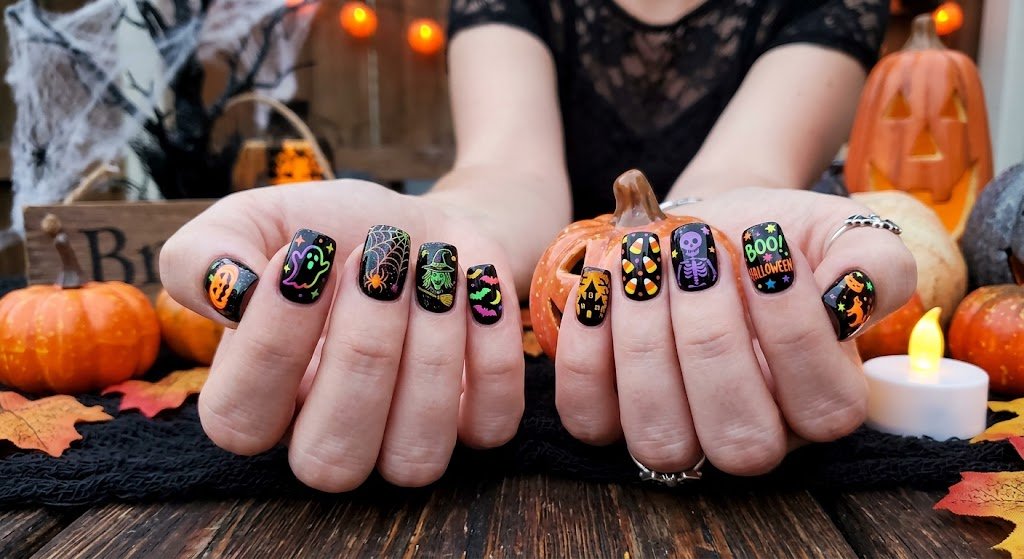
Trending Twists on Black Halloween Nails
These ideas add a modern detail to a black base. They are good if you want something a little different from the classic web or bat.
- Black-and-white checkerboard. Small black and white squares, either on every nail or mixed with solid black nails. Small squares work best on short nails.
- Mismatched black and white nails. Give each nail its own design, such as a web, a ghost, a bone pattern and a solid black. It is a good option if you cannot pick just one idea.
- Stitched French tips. A black tip with a row of tiny dashes across it, so it looks like stitches. It reads as cute rather than creepy, and it needs a fine brush.
- Jelly or sheer black. A translucent black with a glassy finish. It is softer than opaque black and feels lighter on the nail.
- Glow-in-the-dark details. Black nails with a glow-in-the-dark accent. Test the product first, because the strength of the glow varies by brand.
Easy Spiderweb Nails for Beginners
A spiderweb is the most recognizable black Halloween nail design, and it is easier than it looks. The secret is to keep the lines thin and to let the black base dry fully first.
What you need: black polish, white or silver polish (or nail art paint), a thin nail art brush or a toothpick, and a top coat.
- Paint two thin coats of black and let them dry completely. A web painted on tacky polish will smear.
- Choose one corner of the nail as the center of the web. The top corner or one side works well.
- With a small amount of white polish on the brush, draw three or four lines fanning out from that corner toward the edge of the nail. Slightly curved lines look more natural than straight ones.
- Connect the lines with small curved scoops. Two or three rows are enough.
- If you like, add a tiny dot or a small rhinestone as a spider.
- Let the details dry, then seal everything with a top coat.
Tips that help: wipe extra polish off the brush before you draw, and start with one accent nail. If a line goes wrong, clean it up with a small brush dipped in remover once the black is dry.
Halloween Black Nails for Short and Long Nails
The best design depends on how much space you have to work with.
Best Designs for Short Nails
Short nails have limited room, so simple designs look neatest. Good choices include solid glossy or matte black, a black micro French, a single web accent, tiny stars or bats, and small checkerboard squares. Try not to crowd several details onto one nail.
Best Designs for Long, Almond and Coffin Nails
Longer nails give you more space for art. Almond and coffin shapes suit chrome, cat-eye, long web lines and blood drips. Stiletto nails look dramatic in matte black. Longer nails can catch or snap more easily, so shape them evenly and seal the free edge with a top coat.
Best Nail Shapes for Halloween Black Nails
Nail shape changes how a design looks, so it helps to match the two. The table below is a general guide, not a strict rule.
| Shape | Overall look | Works well with |
|---|---|---|
| Short square | Neat and practical | Solid black, French tips, small accents |
| Almond | Soft and elegant | Chrome, cat-eye, simple art |
| Coffin | Bold and dramatic | Blood drips, skulls, 3D charms |
| Stiletto | Sharp and gothic | Matte black, long webs, statement looks |
| Oval | Rounded and classic | Minimal designs, glitter ombré |
If you type a lot, work with your hands, or have not worn long nails before, short square or short almond shapes are usually the most comfortable choice.
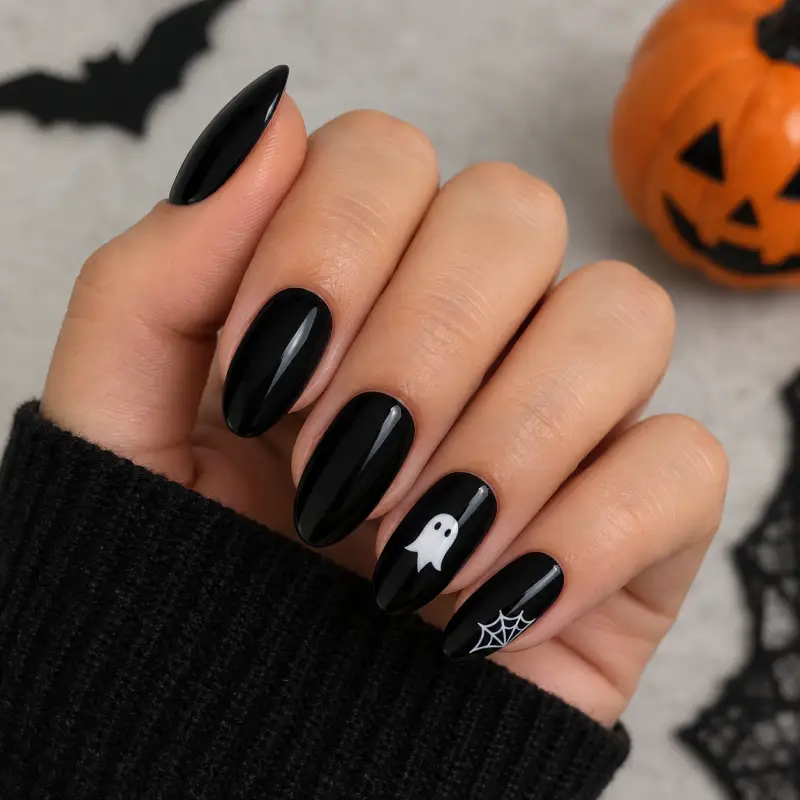
Matte vs Glossy Black Nails: Which Should You Choose?
Both finishes look good, but they feel different. Glossy black is bright and reflective, so it shows off nail art clearly and looks polished. Its downside is that it can show fingerprints and small bumps more easily.
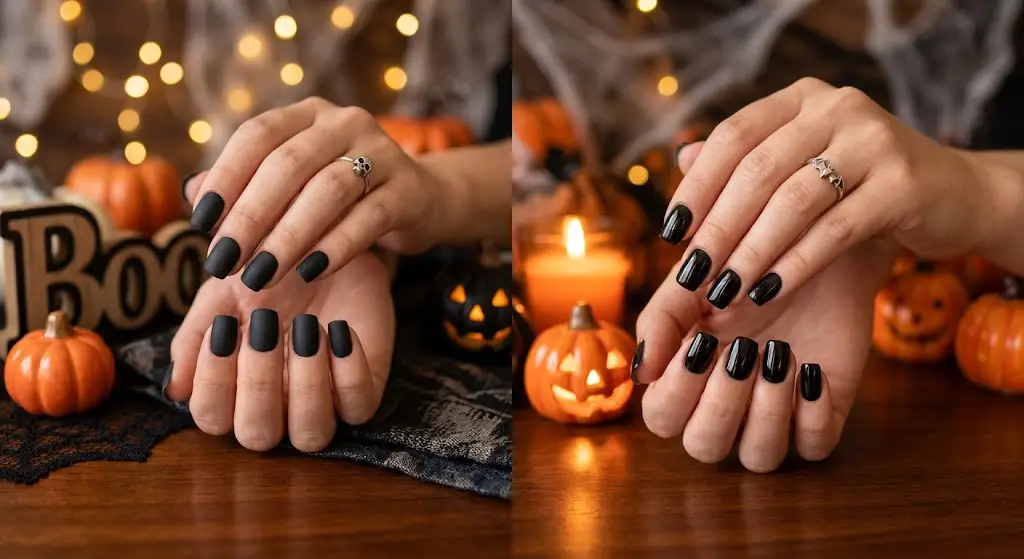
Matte black has a flat, soft finish that looks stylish and understated. It works well if you want a Halloween look that does not feel too obvious. Matte top coats can sometimes show oils or marks from your skin, so it is worth checking how the finish looks in daylight before a big event.
If you cannot decide, mix them. Paint your nails matte and add a glossy detail, such as a web or a tip. This gives contrast without needing any extra colors.
How to Do Halloween Black Nails at Home
Black polish is less forgiving than lighter shades, because mistakes and streaks show up quickly. These steps help.
What You Will Need
- Nail file and buffer
- Base coat
- Black polish (gel or regular, depending on your method)
- Top coat (glossy or matte)
- A thin nail art brush or dotting tool for details
- Polish remover and cotton buds for clean-up
- An LED or UV lamp, if you are using gel
Step-by-Step Method
- Prepare your nails. Remove old polish, shape your nails and gently push back your cuticles. Wash and dry your hands so no oil is left on the nail.
- Apply a base coat. This helps polish stick better and can reduce the chance of dark pigment marking your natural nails.
- Paint thin coats of black. Two thin coats usually look smoother than one thick coat. Let each coat dry (or cure it, if you are using gel, following the instructions on your product).
- Add your design. Use a thin brush or dotting tool. Practice a web or a dot pattern on paper or a spare tip first.
- Clean the edges. Dip a small brush or cotton bud in remover and tidy the skin around your nails.
- Seal with top coat. Choose glossy or matte. Cap the free edge of the nail to help prevent chipping.
Common Mistakes to Avoid
- Putting on thick coats, which can stay soft and smudge.
- Painting details before the black has fully dried or cured.
- Making the art too detailed for your skill level. One accent nail is a perfectly good design.
- Skipping the top coat, which leaves fine details more likely to wear off.
Press-On, Gel or Regular Polish: Which Is Best?
The best way to wear Halloween black nails depends on your time, budget and comfort level. Wear time varies by brand and by how you use your hands, so always follow the manufacturer’s directions.
| Option | Ease | Typical wear time | Best for |
|---|---|---|---|
| Regular polish | Easy, but needs drying time | Often several days | Beginners and last-minute looks |
| Gel polish (home kit) | Moderate, needs a lamp | Often one to three weeks | Longer wear and a glossy finish |
| Salon gel manicure | Done for you | Often two to three weeks | Detailed art without doing it yourself |
| Press-on nails | Very easy | Often a few days to two weeks | Parties, costumes and complex designs |
Press-ons are the simplest way to get detailed art such as 3D spiders or skulls without painting them. Regular polish is the cheapest and easiest to change. Gel is a good middle option if you want your manicure to last through the whole of October.
Color Combinations That Work With Black
A single extra shade can completely change the mood of a black manicure.
| Pair with black | Mood | Example |
|---|---|---|
| Red | Vampy and dramatic | Blood drips, red French line |
| Orange | Playful and seasonal | Pumpkin accent, orange tips |
| Purple | Witchy and mystical | Purple cat-eye, accent nail |
| White or silver | Classic and spooky | Webs, bones, stars |
| Gold | Glamorous | Foil, thin lines, charms |
| Neon green | Fun and bright | Slime drips, glow effects |
How to Match Halloween Black Nails to Your Costume
You do not need to match your nails exactly, but a few small details can tie your look together.
- Witch: matte black with a purple or green accent nail.
- Vampire: black with red drips or a thin red French line.
- Skeleton: black with white bone lines or tiny skulls.
- Ghost or classic costume: simple glossy black or black French tips.
- Casual party outfit: matte black or black micro French, with one small design if you like.
How to Make Halloween Black Nails Last (and Remove Them Safely)
A few habits help your manicure stay neat. Use a base coat and top coat, wear gloves when washing dishes or cleaning, and avoid using your nails as tools. If a regular polish top coat starts to look worn, you can add a fresh layer.
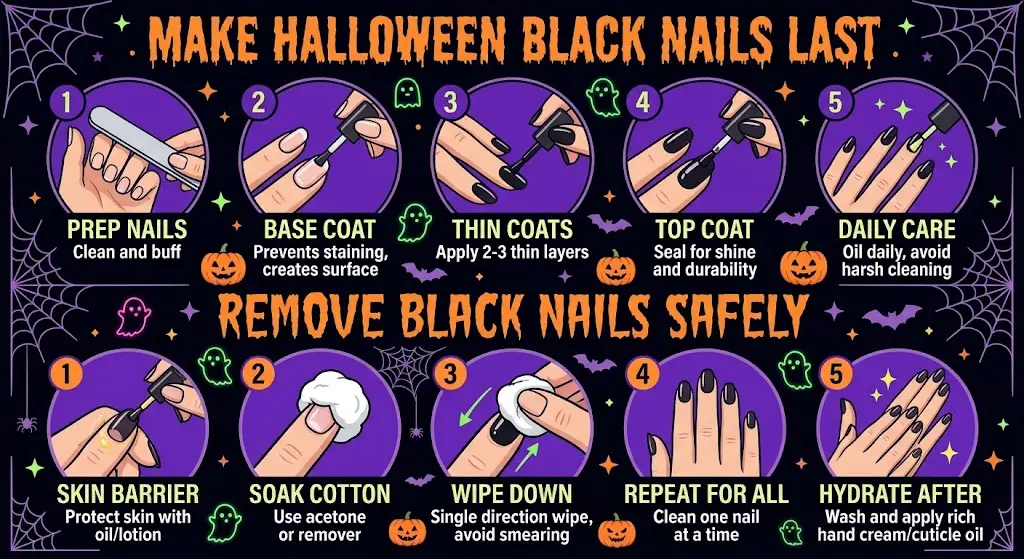
When it is time to remove your nails, avoid peeling or scraping, which can damage the natural nail underneath. Regular polish comes off with remover. Gel polish and press-on nails usually need soaking or a product-specific removal method, so follow the instructions on your kit. Afterwards, moisturize your cuticles and give your nails a short break if they feel dry or weak.
Frequently Asked Questions About Halloween Black Nails
Are black nails good for Halloween?
Yes, Black is closely tied to Halloween themes, and it works as a base for both simple and detailed designs. It also looks stylish on its own, so you can keep wearing it after the holiday.
What goes well with Halloween black nails?
Red, orange, purple, white, silver and gold all pair well with black. Choose one extra color if you want a clean look, or two if you like something bolder.
Are Halloween black nails suitable for short nails?
Yes, Short nails suit solid black, black French tips and small accents like a tiny web or star. Very intricate designs can look crowded on a small nail, so keep details minimal.
Can I wear Halloween black nails to work or school?
Often yes, especially in a matte or simple glossy finish without charms or bold art. If your workplace has a dress code, check it first.
How long do Halloween black nails last?
It depends on the type. Regular polish usually lasts fewer days than gel, and press-ons vary by brand and glue or adhesive. Prep, thin coats and a good top coat all help.
Should I choose matte or glossy black for Halloween?
Choose glossy if you want nail art to stand out. Choose matte if you want a softer, more modern look. A matte base with a glossy detail is a good compromise.
How do I stop black nail polish from looking streaky?
Apply thin coats rather than thick ones, let each layer dry fully, and use a base coat to create a smoother surface. A good-quality, highly pigmented polish can also help.
Can I do Halloween black nails if I have never done nail art?
Yes, Start with a solid black base and add one simple detail, such as a dot pattern or a tiny star. Press-on nails are another low-effort option.
Final Thoughts
Halloween black nails are a flexible choice. You can keep them minimal with a matte finish, add a thin French tip, or go all out with chrome, drips and 3D charms. The best look is the one that suits your nail length, skill level and daily routine.
If you are unsure where to start, pick a simple black manicure and add one small accent. Once you feel confident, you can try webs, bones or color combinations. Whichever style you choose, thin coats, a good top coat and careful removal will help your nails look their best this season.