35 Halloween Nail Ideas: Cute, Spooky & Easy Designs for Every Skill Level
Looking for Halloween Nail Ideas that are easy to recreate but still look impressive? Halloween is the perfect time to experiment with your manicure. You do not need professional nail-art skills or complicated tools to create a fun seasonal look.
From cute ghost nails and tiny pumpkins to elegant black French tips and dramatic spider webs, there are plenty of Halloween Nail Ideas for every style and skill level. Whether you have short nails, long nails, or simply want a quick manicure for a Halloween party, you can find a design that works for you.
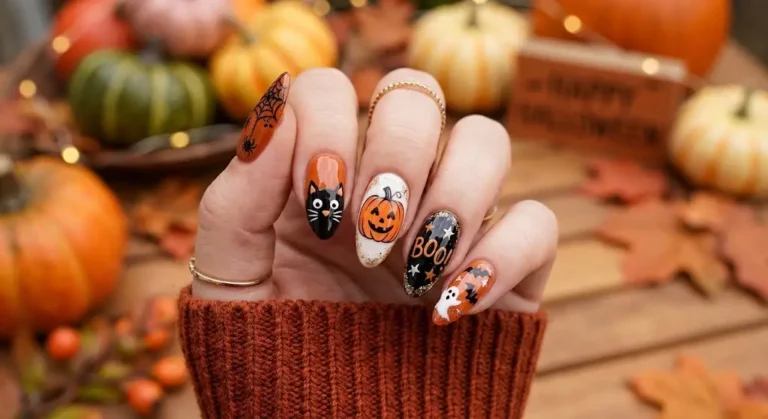
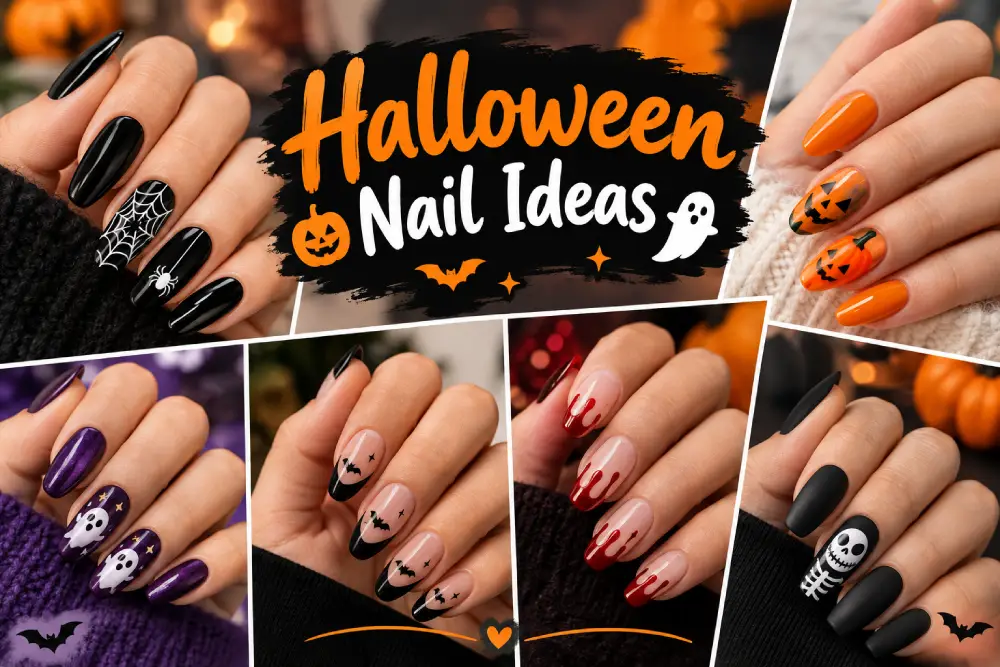
In this guide, we have gathered 35 Halloween Nail Ideas ranging from simple beginner designs to more detailed nail art. You will also find color combinations, practical application tips, design suggestions, and answers to common questions.
Hi, I’m Daisy! I put this guide together from designs I’ve tried myself plus lots of research — so whether you’re a total beginner or a nail-art lover, you’ll find something here that actually works.
35 Halloween Nail Ideas to Try This Season
The best Halloween Nail Ideas do not have to be complicated. A simple color combination with one small Halloween detail can sometimes look more polished than an overly detailed manicure.
Here are some ideas to inspire your next Halloween manicure.
1. Classic Black Halloween Nails
Black nail polish is one of the easiest choices for Halloween. It works beautifully on both short and long nails and can look spooky, elegant, or edgy depending on the finish.
For a simple manicure, apply two thin coats of black polish and finish with a glossy top coat. You can also add a tiny spider, moon, or silver detail to one or two nails.
2. Black and Orange Halloween Nails
Black and orange are classic Halloween colors, making them an easy combination for seasonal nail art. Try alternating black and orange nails, or use orange as the base with black French tips. This is one of the easiest Halloween Nail Ideas if you want a recognizable Halloween look without detailed artwork.
3. Cute Ghost Nail Art
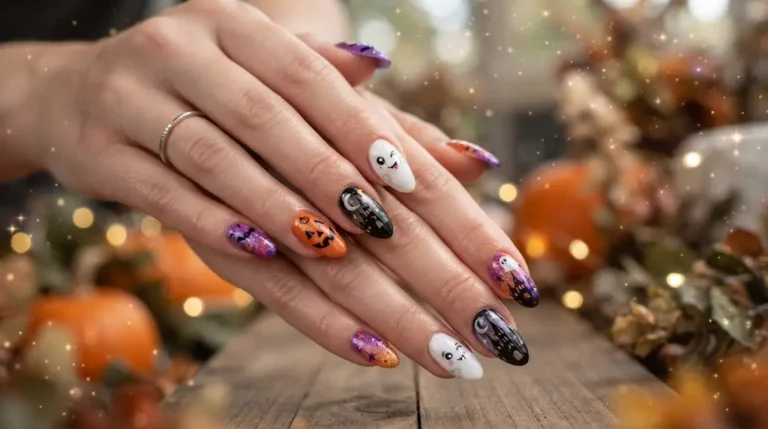
Small white ghosts can turn an ordinary manicure into a playful Halloween design. Start with a dark base such as black, purple, or deep blue. Add small white ghost shapes and use a tiny amount of black polish for their eyes and mouths. This is one of the best Halloween Nail Ideas for beginners because the ghost shapes do not have to be perfectly identical.
4. Pumpkin Nail Art
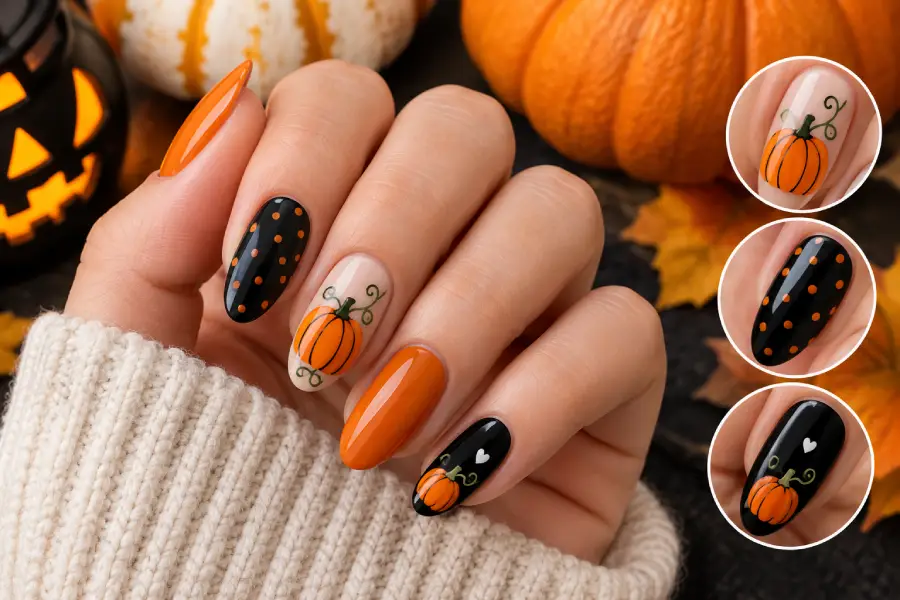
Pumpkins are another simple choice for Halloween nail art. Use orange polish to create small pumpkin shapes over a nude, cream, black, or dark green base. Add a tiny stem for extra detail. If painting pumpkins on every nail feels difficult, use one pumpkin as an accent nail while keeping the remaining nails a solid color.
5. Halloween French Tips
If you prefer a clean and modern manicure, try Halloween-inspired French tips.
Instead of traditional white tips, experiment with:
- Black
- Orange
- Purple
- Deep red
- Metallic silver
You can also add tiny bats, stars, or spider webs over the French tips.
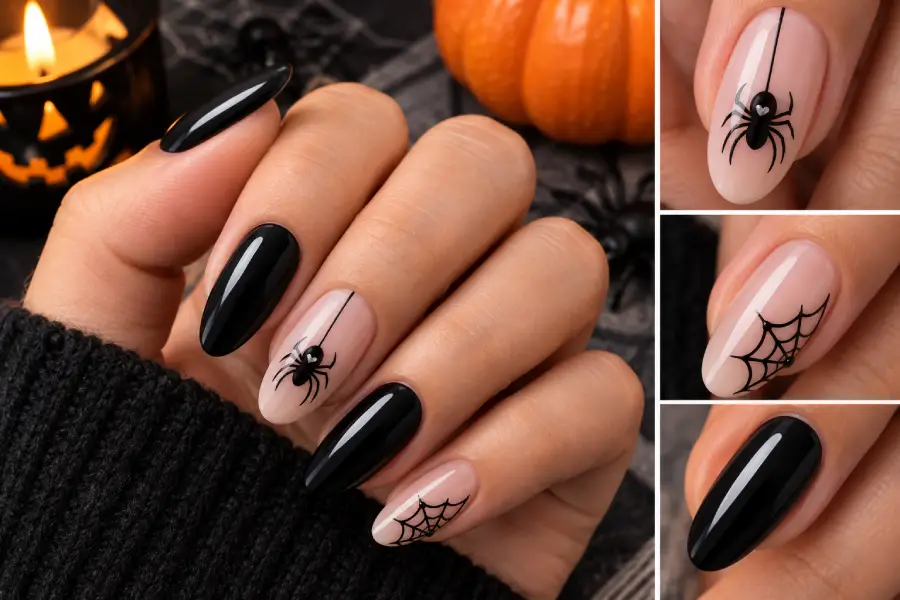
6. Spider Web Nails
Spider webs are a classic Halloween motif and can be adapted to both simple and detailed manicures. For an easy version, use a thin nail-art brush to draw several lines from one corner of the nail. Connect them with small curved lines to create a web.
White spider webs over black polish create a dramatic contrast, while black webs over nude polish give a softer appearance.
7. Spider Accent Nails
You do not need to put spiders on every nail. Paint most of your nails in a solid Halloween shade and use one accent nail for a small spider design. This creates a focal point without making the manicure look too busy.
8. Blood-Drip Nails
For a dramatic look, try red drip designs over a black, white, nude, or pale pink base. Create several uneven red shapes near the nail tip and extend them slightly downward to create the appearance of drips. This is one of the more dramatic Halloween Nail Ideas, but the basic technique is relatively simple.
9. Vampire-Inspired Nails
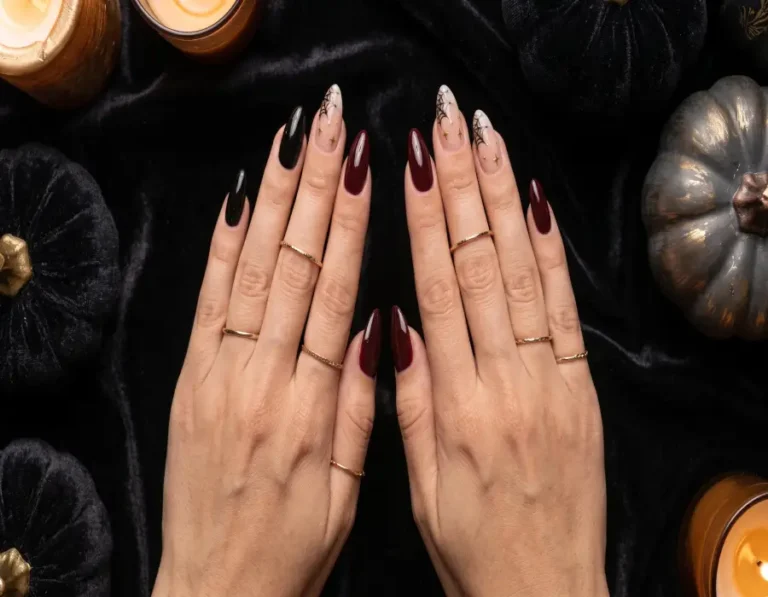
Deep red and black create a dramatic vampire-inspired manicure. Try glossy burgundy nails with black French tips or add small fang shapes to an accent nail. For a glamorous version, add subtle metallic details or a high-shine top coat.
10. Matte Black Halloween Nails
Matte black polish can create a Halloween look without any artwork. If you have glossy black polish, a suitable matte top coat can change the finish. You can also combine matte and glossy finishes to create subtle contrast.
11. Black Cat Nails
Black cats are a natural Halloween theme. Instead of painting detailed cat illustrations, beginners can try small cat ears, eyes, or simple silhouettes.
A black cat silhouette against a nude, cream, or orange background can create a cute Halloween manicure without requiring advanced skills.
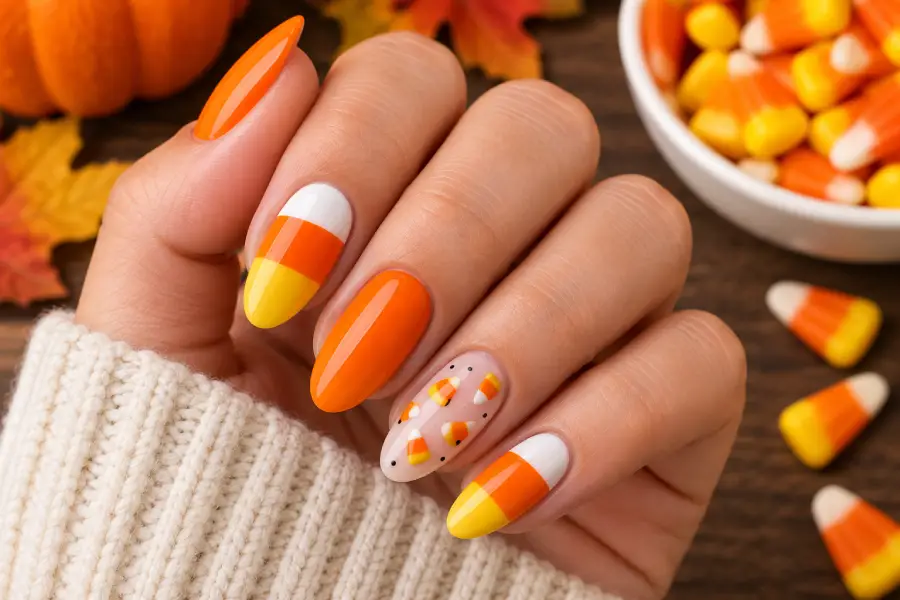
12. Candy Corn Nails
Candy-corn-inspired nails use yellow, orange, and white. You can create horizontal sections or use simple stripes to represent the traditional color combination. Because this design requires multiple layers, apply thin coats and allow each layer enough time to dry.
13. Purple Halloween Nails
Halloween nail art does not have to focus only on black and orange. Deep purple, plum, and violet shades can create a mysterious seasonal look. Combine purple with black, silver, white, or glitter for extra detail. Try adding tiny stars, moons, or bats to create a mystical manicure.
14. Witch-Inspired Halloween Nails
For a witch-inspired look, experiment with black, dark purple, green, and metallic shades. You can add tiny moons, stars, witch hats, potion bottles, or broom-inspired details. If detailed artwork is difficult, simply use a dark color palette with one metallic accent nail.
15. Moon and Stars Nails
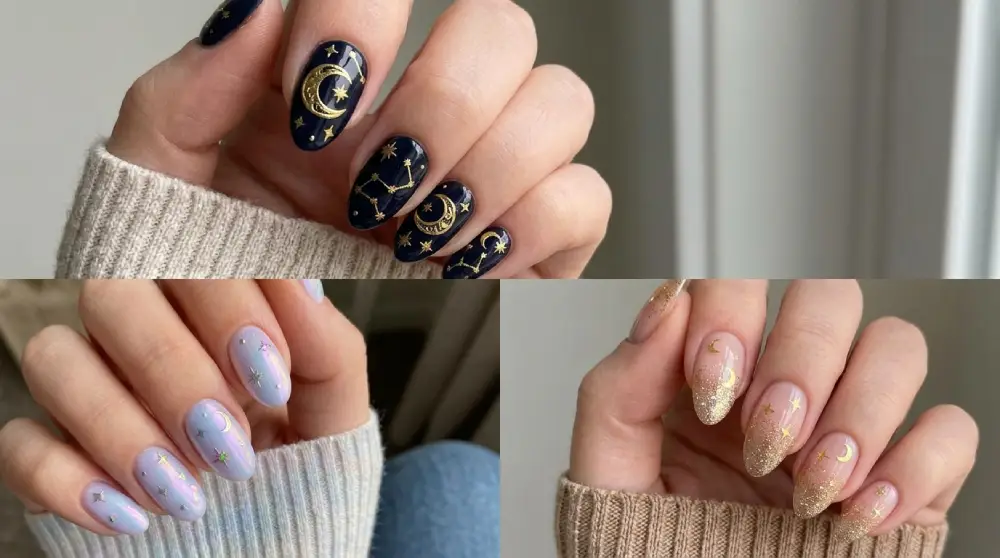
Moon-and-star designs offer a subtle alternative to traditional spooky nail art. Use black, navy, or dark purple as the background and add small white, silver, or gold stars. A simple crescent moon on one accent nail can complete the design.
16. Haunted House Nails
Haunted-house nail art is more detailed but can create an impressive Halloween manicure. Use a dark background and create a simple house silhouette with a pointed roof. Add small windows and a moon for extra atmosphere. Because of the detail involved, this design works especially well on one or two accent nails.
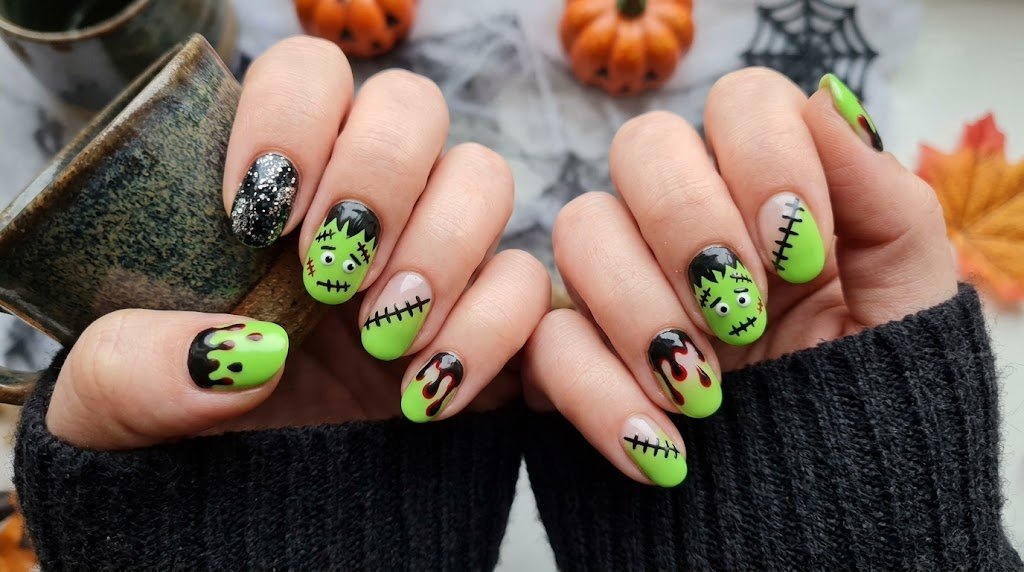
17. Frankenstein Nails
Frankenstein-inspired nails can be created with green polish and simple black details. Use green as the base and add black hair, stitches, or facial features. Beginners should focus on recognizable details instead of trying to create a highly detailed face.
18. Mummy Nails
Mummy nails are surprisingly easy to create. Start with a light-colored base and add thin black, gray, or brown lines across the nail. The lines do not need to be perfectly straight. Slightly uneven lines can actually make the design look more interesting.
19. Skeleton Nails
Skeleton-inspired nail art can range from simple bone details to detailed skull designs. If you are new to nail art, create one small skull on an accent nail rather than attempting a detailed skeleton on every nail.
20. Evil Eye Halloween Nails
An eye design can create a mysterious Halloween manicure without using traditional characters. Try a dark base with contrasting white, blue, or metallic details. Keep the other nails simple so the eye design remains the main focus.
21. Chrome Halloween Nails
Chrome finishes can give traditional Halloween colors a modern appearance. Silver chrome works particularly well with black, purple, burgundy, and deep red. Use chrome on all your nails for a bold look or apply it only to one or two accent nails.
22. Black-and-White Halloween Nails
If orange is not your favorite color, choose a black-and-white palette. This combination can be used to create ghosts, bats, spider webs, skulls, and minimalist patterns. It is also one of the easiest Halloween Nail Ideas to match with different outfits.
23. Halloween Aura Nails
Aura-style nails can be adapted using Halloween colors such as orange, red, purple, and black. A darker outer area with a brighter center can create a soft gradient effect. Because blending can take practice, this design may be easier with suitable nail-art tools or professional application.
24. Ombre Halloween Nails
Ombre nails are another way to create seasonal nail art without painting characters.
Try combinations such as:
- Black to red
- Purple to black
- Orange to red
- Nude to black
You can add tiny Halloween details over the gradient if you want a more decorative finish.
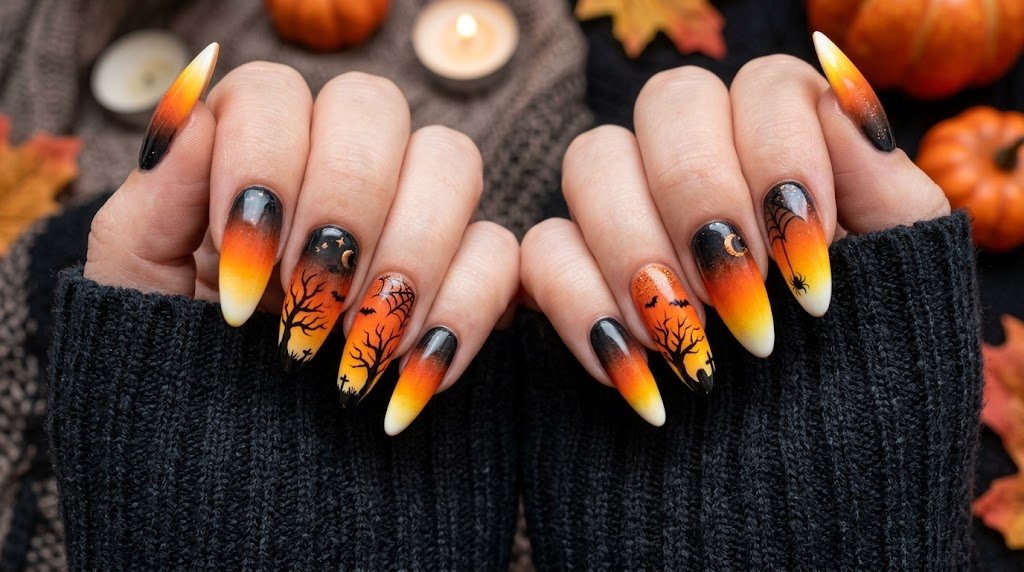
25. Coffin-Shaped Halloween Nails
Coffin-shaped nails can provide extra space for dramatic Halloween nail art. The nail shape itself does not make the manicure Halloween-themed, so pair it with black polish, blood-red accents, spider webs, glitter, or other seasonal details.
26. Short Halloween Nails
You do not need long nails to enjoy creative Halloween nail art.
Some great Halloween Nail Ideas for short nails include:
- Tiny pumpkins
- Ghost faces
- Black French tips
- Mini bats
- Orange-and-black patterns
- Small stars and moons
Keep the artwork relatively simple so the nails do not look overcrowded.
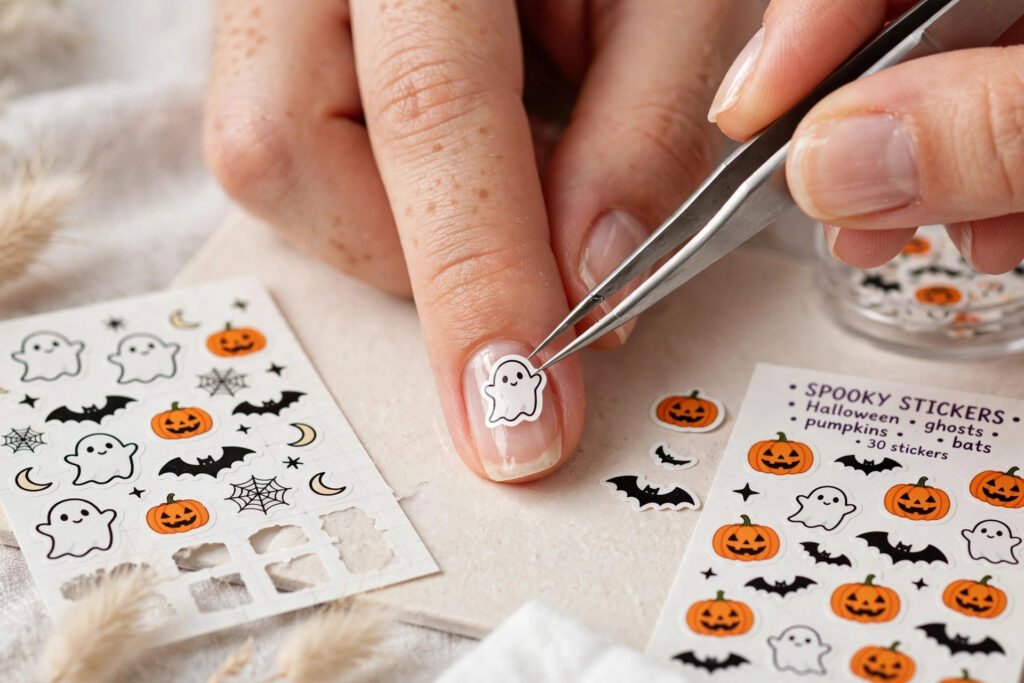
27. Halloween Nail Stickers
Nail stickers can be especially useful for beginners. They allow you to add detailed bats, ghosts, pumpkins, skulls, and spider webs without drawing everything by hand. Apply your base color first, allow it to dry properly, place the sticker carefully, and seal it according to the product instructions.
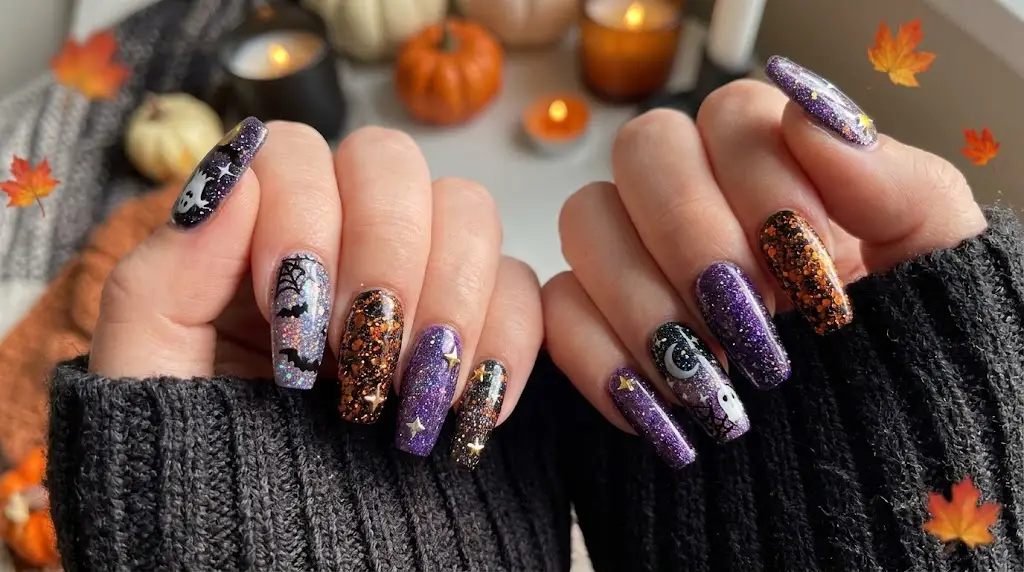
28. Glitter Halloween Nails
Glitter can add a festive touch to simple Halloween nails. Try black polish with silver glitter, orange glitter over a neutral base, or deep purple with shimmer. You can also use glitter on only one or two nails for a more balanced look.
29. Pumpkin Spice-Inspired Nails
For a softer autumn manicure, combine burnt orange, brown, cream, and muted green. This is a good choice if you want Halloween Nail Ideas that feel seasonal without being extremely spooky.
30. Elegant Halloween Nails
Halloween nails can also look sophisticated. Try nude nails with black French tips, dark burgundy polish, subtle metallic details, or minimalist spider webs. These designs are useful if you want a Halloween manicure that works with formal or professional outfits.
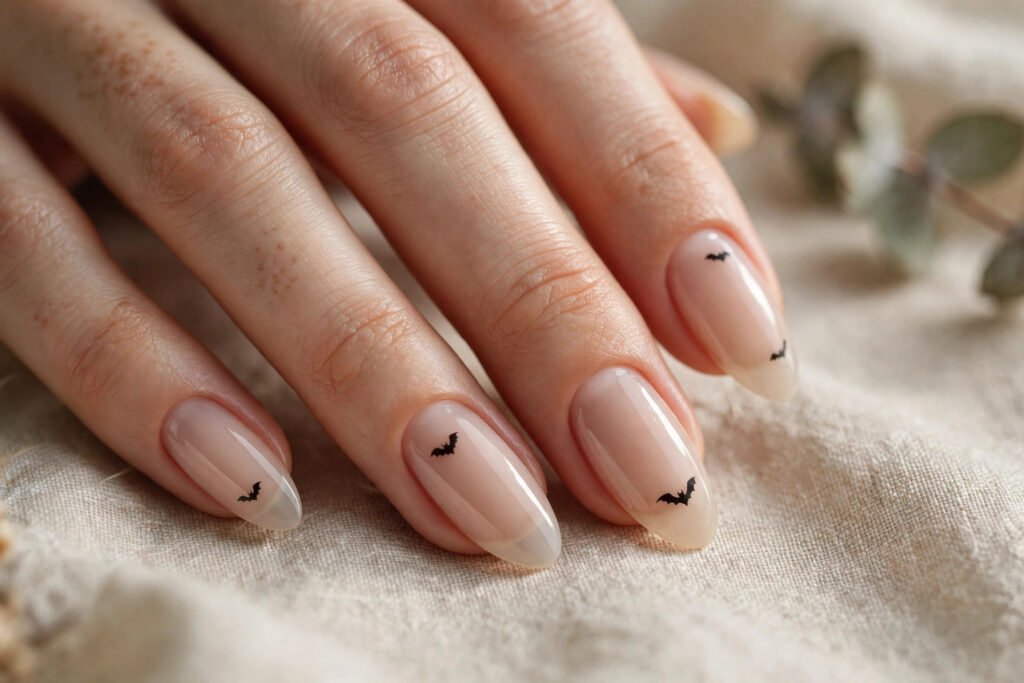
31. Minimalist Halloween Nails
Minimalist nail art focuses on small details rather than covering every nail. Try a nude base with tiny black bats, a single ghost, a small crescent moon, or one spider web. Simple designs can be particularly effective when the details are clean and evenly placed.
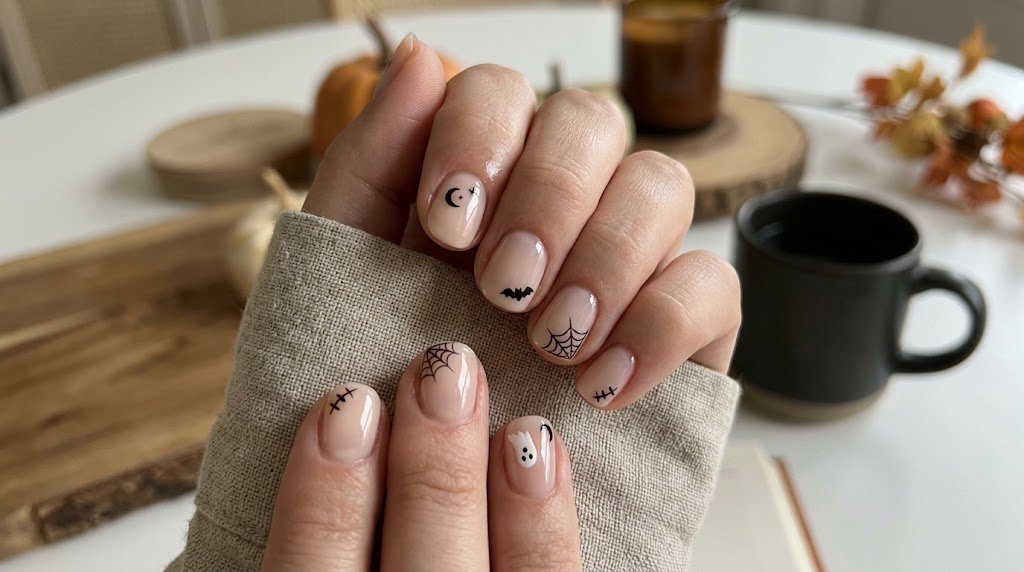
32. Red and Black Halloween Nails
Red and black create a bold Halloween combination. Use glossy red as the main shade and add black French tips, abstract lines, or small Halloween details. Deep burgundy can also be used if you prefer a less bright red.
33. Glow-in-the-Dark Halloween Nails
Glow-in-the-dark polish can create a fun effect for Halloween events and evening gatherings. Follow the instructions provided with the specific product because application and activation requirements can vary.
34. 3D Halloween Nails
If you enjoy more elaborate manicures, consider raised decorations such as charms or textured details.
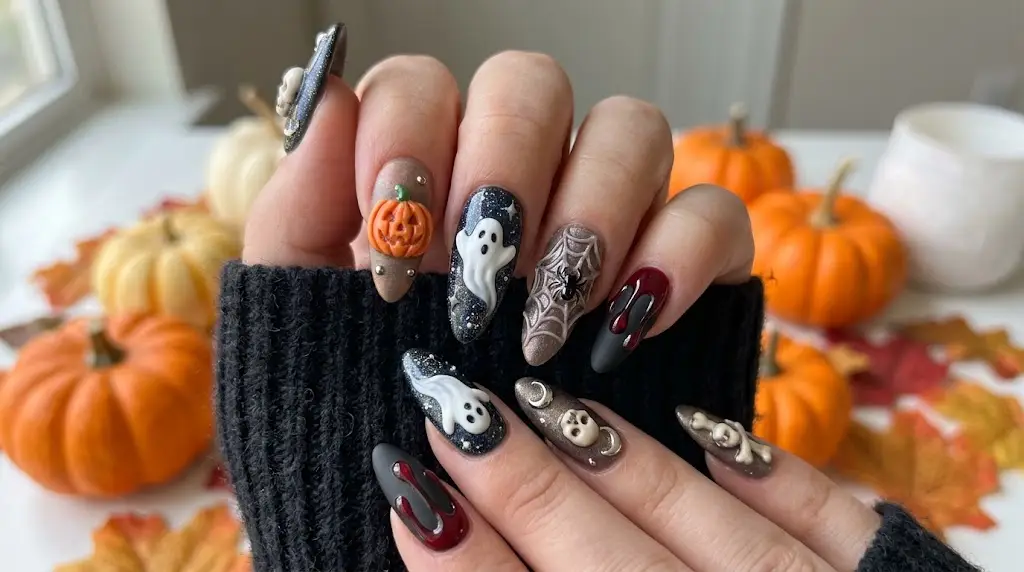
Make sure decorations are securely attached and comfortable because raised nail art can catch on clothing and other surfaces.
35. Simple Halloween Accent Nail
If you cannot decide between different Halloween Nail Ideas, keep your manicure simple. Paint nine nails in one color and dedicate one nail to Halloween artwork. You could use a ghost, pumpkin, spider, bat, skull, or spider web as the accent. This approach gives you a festive manicure without requiring advanced nail-art skills.
Halloween Nail Ideas by Skill Level
Choosing a design based on your experience can make the process easier.
| Skill Level | Halloween Nail Ideas | Difficulty |
|---|---|---|
| Beginner | Black nails, orange nails, glitter, stickers | Easy |
| Beginner | Ghosts, pumpkins, French tips | Easy to Moderate |
| Intermediate | Spider webs, bats, blood-drip designs | Moderate |
| Intermediate | Ombre, mummy, Frankenstein designs | Moderate |
| Advanced | Haunted houses, detailed skulls, 3D nail art | Advanced |
These categories are general guidelines. Your experience, nail length, tools, and polish can all affect how difficult a design feels.
How to Choose the Right Halloween Nail Ideas
With so many Halloween Nail Ideas available, start by thinking about your skill level, available time, and preferred style.
Consider Your Skill Level
If you rarely create nail art, start with simple shapes and strong color combinations. Black polish with orange accents, ghost faces, stickers, and French tips can create attractive results without requiring advanced techniques. If you already have experience with nail brushes, you can experiment with detailed characters, gradients, and more complex artwork.
Consider How Much Time You Have
Simple designs can be completed faster than detailed artwork. If you are preparing for a Halloween party at the last minute, consider stickers, accent nails, glitter, or French tips. If you have more time, you can try haunted houses, detailed skulls, or layered designs.
Choose Your Overall Style
Think about what you want your manicure to communicate.
Cute: ghosts, pumpkins, candy-inspired colors
Spooky: skulls, spiders, blood-drip designs
Elegant: black French tips, burgundy, subtle metallics
Minimalist: tiny bats, moons, or one accent nail
Glamorous: chrome, glitter, and dark jewel tones
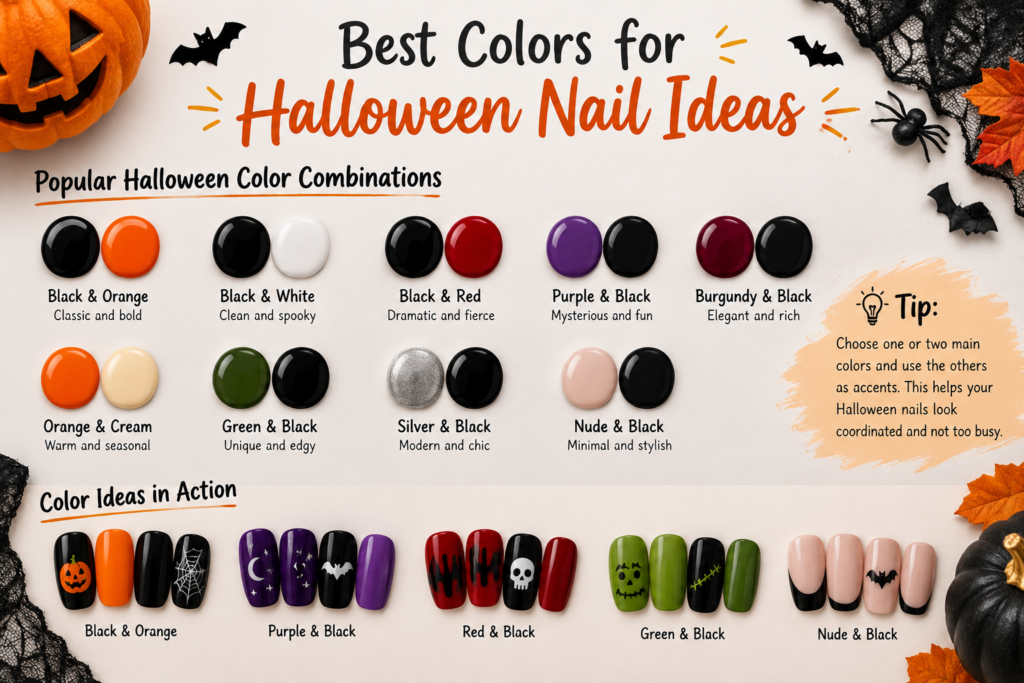
Best Colors for Halloween Nail Ideas
You can create beautiful Halloween nail designs with more than black and orange.
Popular combinations include:
- Black and orange
- Black and white
- Black and red
- Purple and black
- Burgundy and black
- Orange and cream
- Green and black
- Silver and black
- Nude and black
When using several shades, choose one or two main colors and use the others as accents. This helps create a coordinated manicure.
Easy Halloween Nail Art Tools for Beginners
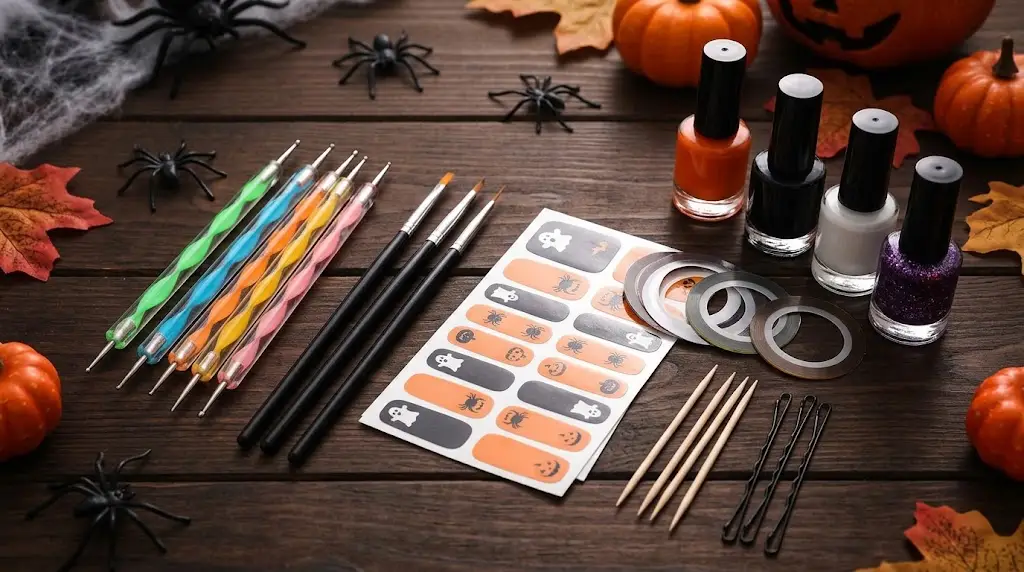
You do not need a professional nail-art kit to get started with Halloween Nail Ideas.
Useful supplies include:
- Base coat
- Halloween-colored nail polish
- Top coat
- Fine nail-art brush
- Dotting tool
- Small cleanup brush
- Nail stickers
- Makeup sponge for simple gradients
- Nail polish remover for cleanup
A toothpick can sometimes be used for very small details, although a proper dotting tool or fine brush can provide better control.
Step-by-Step: Easy Ghost Halloween Nails
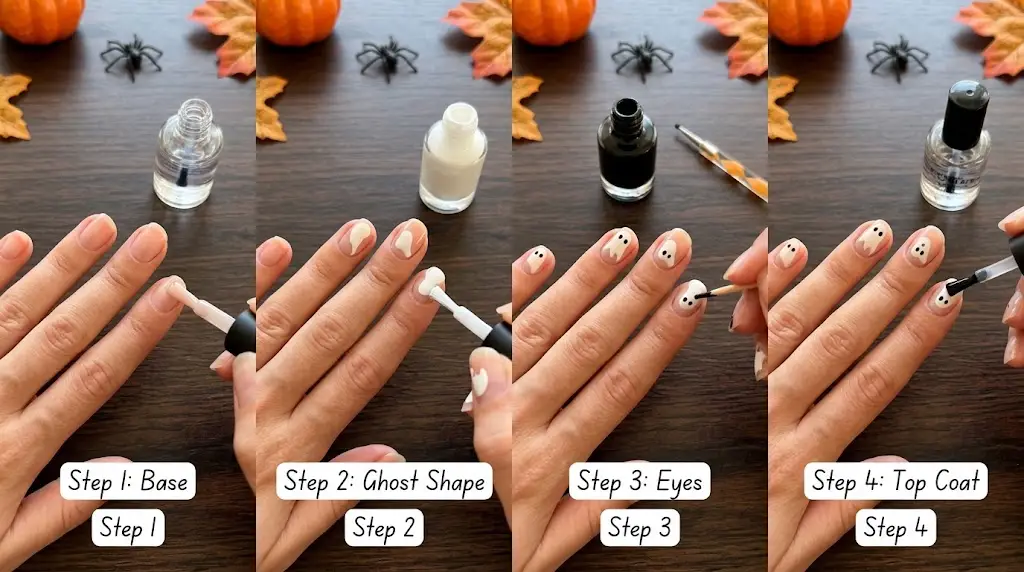
Ghost nails are one of the simplest Halloween Nail Ideas for beginners.
Step 1: Prepare Your Nails
Clean and shape your nails before applying polish.
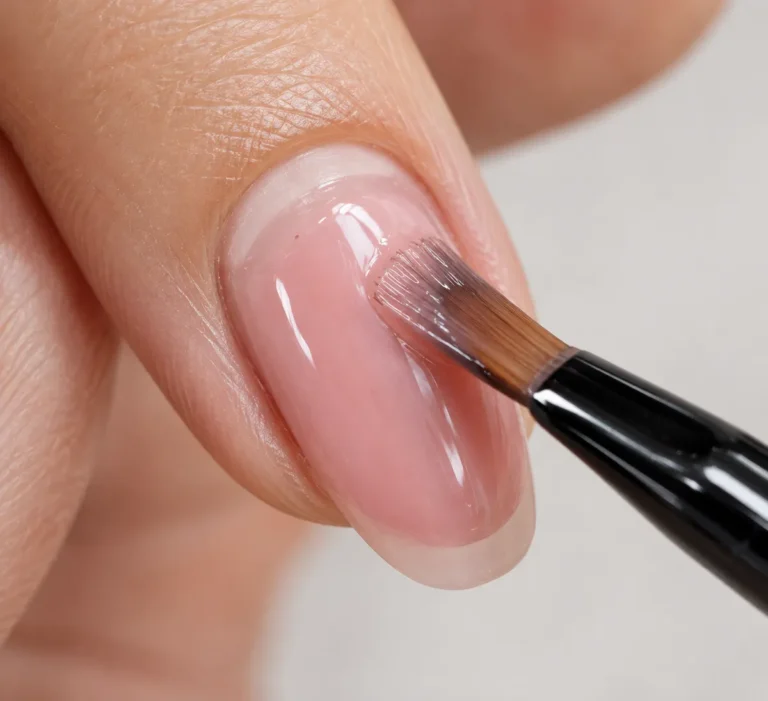
Step 2: Apply Base Coat
Use a suitable base coat to create an even surface.
Step 3: Add Your Background
Apply one or two thin coats of black, purple, nude, or another suitable color.
Step 4: Paint the Ghosts
Use white polish to create small rounded ghost shapes.
Step 5: Add the Faces
After the white polish has dried sufficiently, add two small black eyes and a tiny mouth.
Step 6: Apply Top Coat
Once the design has dried enough, carefully apply a suitable top coat.
Tips for Long-Lasting Halloween Nails
Good preparation can help your manicure stay neat.
Keep coats thin. Thick polish can take longer to dry and may smudge more easily.
Allow enough drying time. Rushing between layers can damage fresh nail art.
Seal the edges. Applying top coat carefully around the free edge can help protect the polish.
Avoid using your nails as tools. Opening containers or scratching surfaces can damage your manicure.
Follow product instructions. Gel systems, stickers, decorations, and other products can have different application requirements.
Aftercare: How to Remove Halloween Nail Art Safely
Nobody talks about this, but removal matters more than application. Glitter and dark polishes can stain, and peeling off stickers can lift layers of your natural nail. Here’s the safe way:
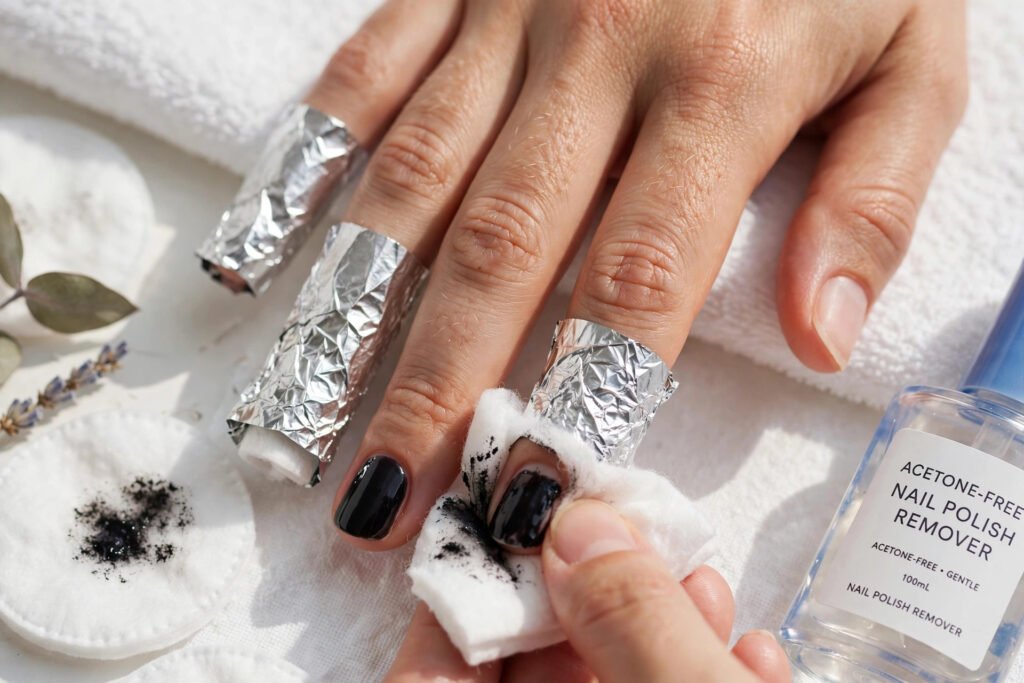
- Soak, don’t peel. Soak nails in warm soapy water or acetone-based remover for 5–10 minutes before gently pushing art off.
- Glitter needs the foil method. Soak cotton in remover, wrap each nail in foil for 10 minutes, then slide off.
- Moisturize after. Cuticle oil or hand cream right after removal — your nails will thank you.
- Take a breather. Give nails 2–3 polish-free days between Halloween sets if they feel thin or dry.
Budget Guide: What Halloween Nails Actually Cost
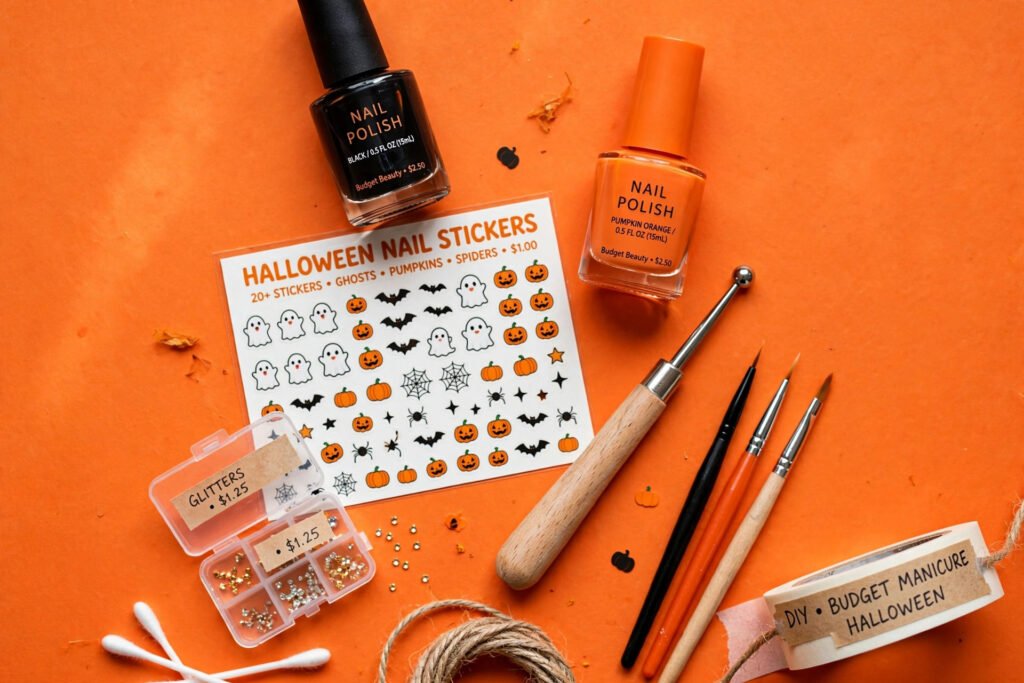
- DIY with polish you own: $0–$15 (just stickers or a dotting tool)
- Press-on Halloween sets: $8–$15
- Salon Halloween nail art: $40–$90+, depending on detail and your city
Prices vary, but the point stands: you don’t need a salon budget for great Halloween nails. Some of my favorite looks cost under $10.
Halloween Nails for Kids
Little ones want in on the fun too! For kids, keep it simple and safe: use non-toxic, kid-friendly polish, stick to stickers or simple dots, and skip anything sharp or complicated. I’ve put together a complete guide with age-wise ideas (3–5, 6–9, 10–12) here: Halloween Nails for Kids.
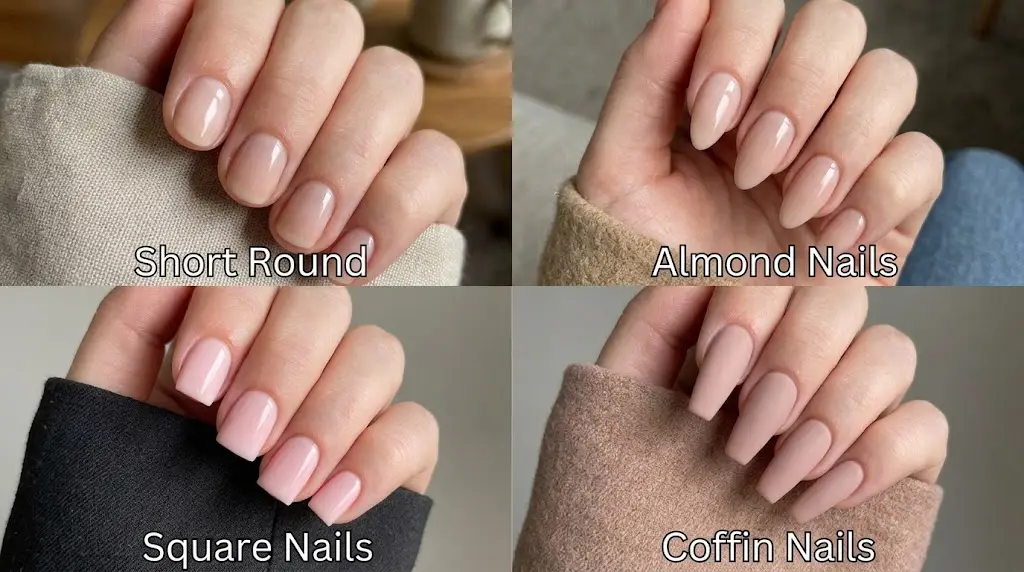
Halloween Nail Ideas for Different Nail Shapes
Your nail shape can influence how much space you have for nail art.
Short Round Nails
Small ghosts, pumpkins, dots, stars, and simple French tips can work well on shorter nails.
Almond Nails
Almond nails provide more length for designs such as spider webs, moons, gradients, and French tips.
Square Nails
Square nails work well with geometric Halloween patterns and French-tip variations.
Coffin Nails
Long coffin nails offer more space for detailed artwork, gradients, charms, and character designs.
Common Halloween Nail Art Mistakes to Avoid
Even simple Halloween Nail Ideas can become messy if too many elements are added.
Adding Too Many Designs
Putting ghosts, spiders, pumpkins, skulls, glitter, and webs on every nail can make the manicure look crowded.
Choose one main theme and use smaller details as accents.
Applying Thick Layers
Thick layers may take longer to dry and can remain soft underneath.
Thin coats generally provide better control.
Skipping Nail Preparation
Uneven or oily nails can make polish application more difficult. Cleaning and preparing the nails first gives you a better starting surface.
Starting With Advanced Designs
If you are new to nail art, begin with dots, lines, French tips, and simple shapes before attempting detailed characters.
Are Halloween Nail Stickers Good for Beginners?
Nail stickers can be a practical option if you want detailed designs without drawing them yourself. They are particularly useful for intricate shapes such as bats, skulls, spiders, and detailed webs. For a clean result, apply them to a clean, dry surface and seal them according to the manufacturer’s instructions.
Stickers vs Hand-Painted vs Press-Ons: Which Should You Choose?
This is the question I get asked most, so here’s the honest breakdown:
| Method | Skill needed | Time | Cost | Best for |
|---|---|---|---|---|
| Stickers/decals | Very little | 20–30 min | $3–$8 | Beginners, detailed art without skills |
| Hand-painted | Practice needed | 1–2 hours | $0–$15 (polish you own) | Custom, one-of-a-kind designs |
| Press-on nails | None | 10 min | $8–$15 | Instant results, zero damage risk |
| Salon | None | 1–2 hours | $40–$90+ | Complex art, long-lasting wear |
My take? Beginners should start with stickers or press-ons. Once you’re comfortable, try hand-painting simple ghosts and dots. There’s no shame in stickers — even nail artists use them for intricate details!
How to Make Halloween Nails Look More Professional
You do not need complicated artwork to create polished Halloween Nail Ideas.
Focus on:
- Clean nail preparation
- Even polish application
- Consistent nail lengths
- Thin coats
- Clean edges
- A coordinated color palette
- A suitable top coat
One carefully created accent nail can often look more polished than ten overcrowded designs.
FAQs
What are the easiest Halloween Nail Ideas for beginners?
Simple black nails, orange-and-black designs, ghost faces, glitter nails, Halloween French tips, and nail stickers are easy places to start.
What colors are best for Halloween nails?
Black, orange, purple, deep red, white, dark green, silver, and burgundy are popular choices for Halloween-inspired manicures.
Can I create Halloween nail art on short nails?
Yes, Short nails can work well with minimalist ghosts, pumpkins, bats, French tips, dots, stars, and simple spider webs.
What are some elegant Halloween Nail Ideas?
Black French tips, burgundy polish, nude nails with black details, subtle spider webs, dark purple polish, and minimalist metallic accents can create a sophisticated Halloween look.
How can I create Halloween nails without nail-art tools?
You can use regular polish brushes, a toothpick for tiny details, or nail stickers. A dotting tool and fine brush can make detailed designs easier but are not essential.
Are Halloween nail stickers easy to use?
They can be easier than hand-painted artwork, especially for detailed designs. Follow the product’s application and sealing instructions for the best result.
How many Halloween designs should I use?
There is no fixed rule. Beginners may find it easier to use one main design on one or two accent nails rather than decorating every nail.
How can I make my Halloween manicure last longer?
Prepare the nails properly, use thin polish layers, allow enough drying time, seal the edges with top coat, and avoid using your nails as tools.
When should I do my Halloween nails?
2–3 days before Halloween (October 31) is ideal for regular polish, so they look fresh for the event. Gel can be done up to a week ahead.
How do I stop dark polish from staining my nails?
Always use a good base coat, and don’t skip it even when you’re in a hurry. Two thin layers work better than one thick one.
Final Thoughts
The best Halloween Nail Ideas can be simple, creative, and easy to personalize. From cute ghosts and pumpkins to elegant black French tips, choose a design that matches your style, nail length, and skill level. With the right colors and a little creativity, you can create a festive Halloween manicure that looks polished and fun.
*Disclaimer: This article is for general inspiration and information. If you have nail allergies or skin sensitivities, check product ingredients and stop use if irritation occurs.*