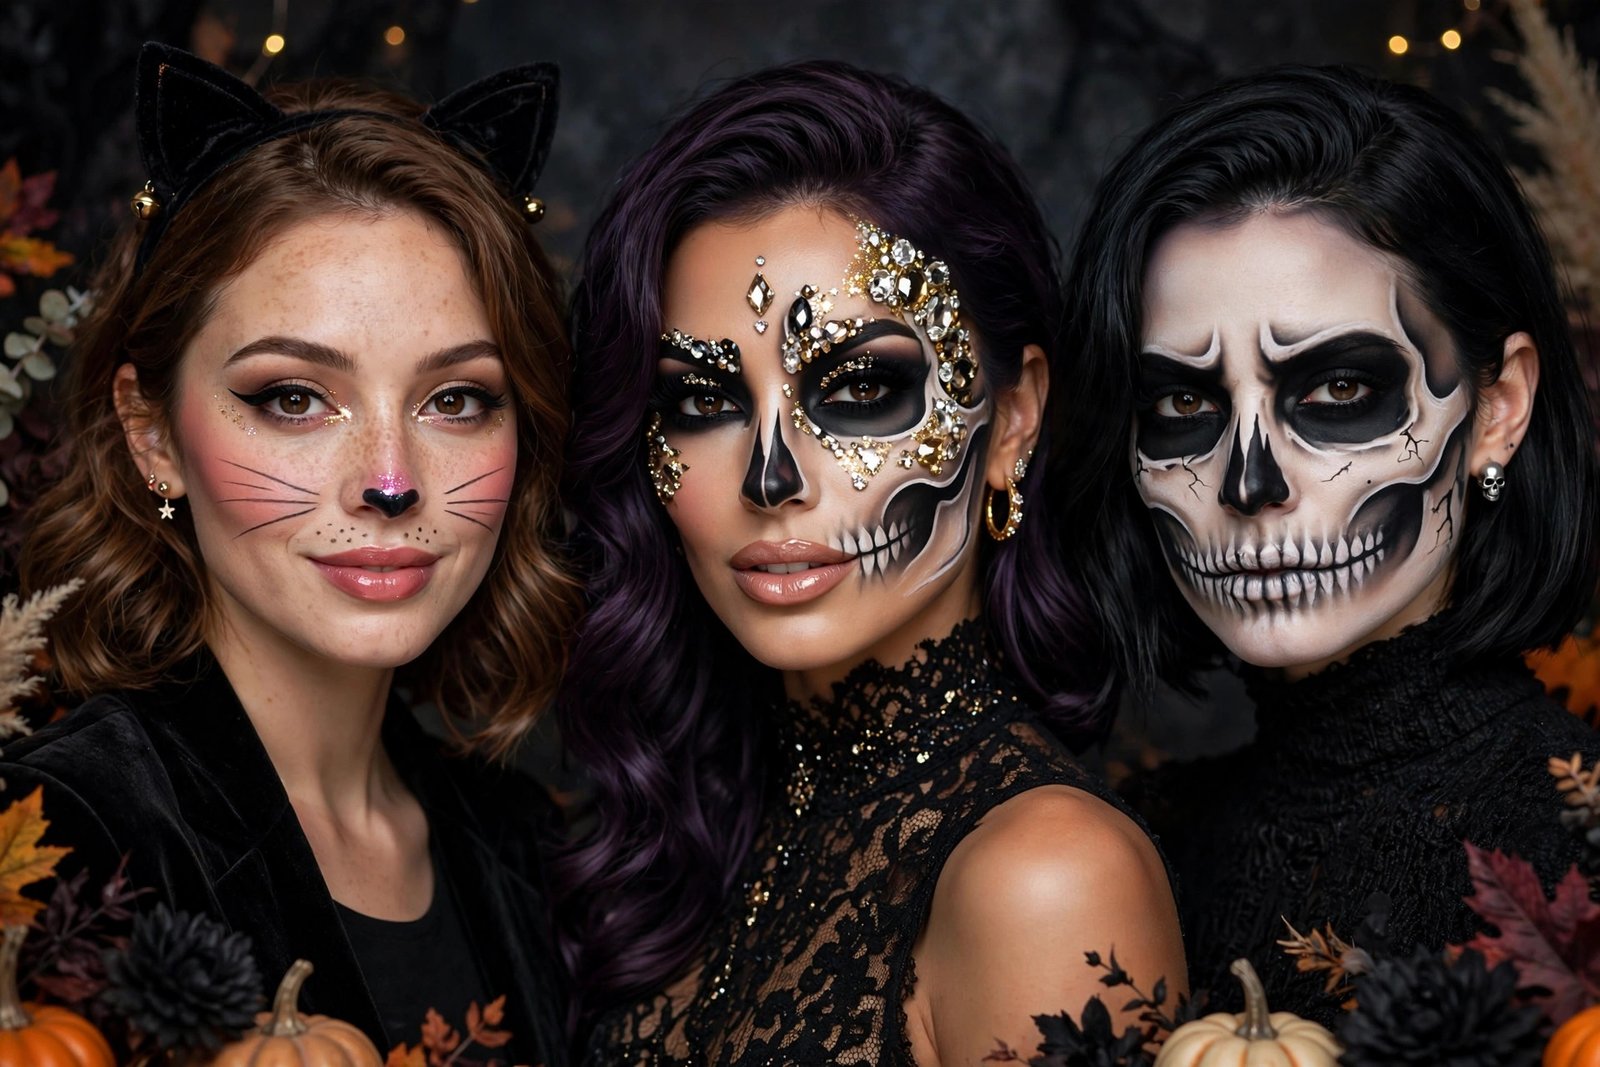
25 Halloween Makeup Ideas for 2026: Easy, Cute & Spooky Looks for Beginners
You don’t need to be a makeup artist to pull off a great Halloween look. Most of the looks in this guide use makeup you already own — eyeliner, eyeshadow, lipstick, and a little patience. Some take 10 minutes. A few take an hour. All of them are doable at home, even if you have never tried costume makeup before.
Hi, I’m Daisy! I put this guide together from careful research into what actually works for beginners — which looks are forgiving, which ones need face paint, and which ones you can skip if you’re short on time. Every look below includes a difficulty rating, an honest time estimate, and clear steps, so you can pick one that fits your evening instead of guessing.
All 25 Looks at a Glance
| # | Look | Difficulty (1–5) | Time | Face Paint Needed? |
|---|---|---|---|---|
| 1 | Classic Cat | 1 | 15 min | No |
| 2 | Simple Ghost | 1 | 10 min | Optional |
| 3 | Easy Vampire | 1 | 20 min | No |
| 4 | Cute Pumpkin | 2 | 20 min | Optional |
| 5 | Spiderweb Eyes | 2 | 20 min | No |
| 6 | Fake Scar | 1 | 15 min | No |
| 7 | Simple Witch | 2 | 25 min | No |
| 8 | Cute Clown | 2 | 25 min | Optional |
| 9 | Simple Sugar Skull | 2 | 30 min | Optional |
| 10 | Skeleton | 3 | 40 min | Yes |
| 11 | Glam Diamond Skull | 3 | 50 min | Yes |
| 12 | Mermaid | 3 | 45 min | Optional |
| 13 | Fairy | 3 | 45 min | No |
| 14 | Zombie | 3 | 40 min | Optional |
| 15 | Fortune Teller | 3 | 40 min | No |
| 16 | Bat Eyeliner | 3 | 25 min | No |
| 17 | Unicorn | 3 | 40 min | No |
| 18 | Cracked Doll | 3 | 35 min | No |
| 19 | Creepy Clown | 4 | 60 min | Yes |
| 20 | Melted Pumpkin | 4 | 55 min | Yes |
| 21 | Gothic Vampire | 4 | 50 min | Optional |
| 22 | Neon Skeleton | 4 | 55 min | Yes |
| 23 | Optical Illusion Face | 5 | 60+ min | Yes |
| 24 | Scarred Lion | 4 | 50 min | Yes |
| 25 | Stitched Doll | 5 | 60+ min | Yes |
Difficulty 1 means anyone can do it. Difficulty 5 means you will want a practice run first. Times are rough estimates for a first attempt — you will get faster with practice.
How to Choose Your Look (3 Quick Questions)
How much time do you have?
Under 15 minutes: pick from the last-minute looks in the list below (Cat, Ghost, Fake Scar). 30 minutes: anything rated 1–2. An hour or more: the medium and scary looks open up.
What do you already own?
If you only have everyday makeup — eyeliner, eyeshadow, lipstick — stick to the looks marked “No” under face paint. If you have face paint or are happy to buy a small kit, the full-face looks like Skeleton and Creepy Clown become possible.
Do you want cute, glam, or scary?
Cute: Cat, Pumpkin, Fairy, Unicorn. Glam: Mermaid, Glam Diamond Skull, Fortune Teller. Scary: Zombie, Skeleton, Creepy Clown, Neon Skeleton. Pick the mood first, and the look gets much easier to choose.
Easy Halloween Makeup Ideas for Beginners (Difficulty 1–2)
These looks are the best place to start. They use simple shapes, forgive wobbly lines, and work with normal makeup.
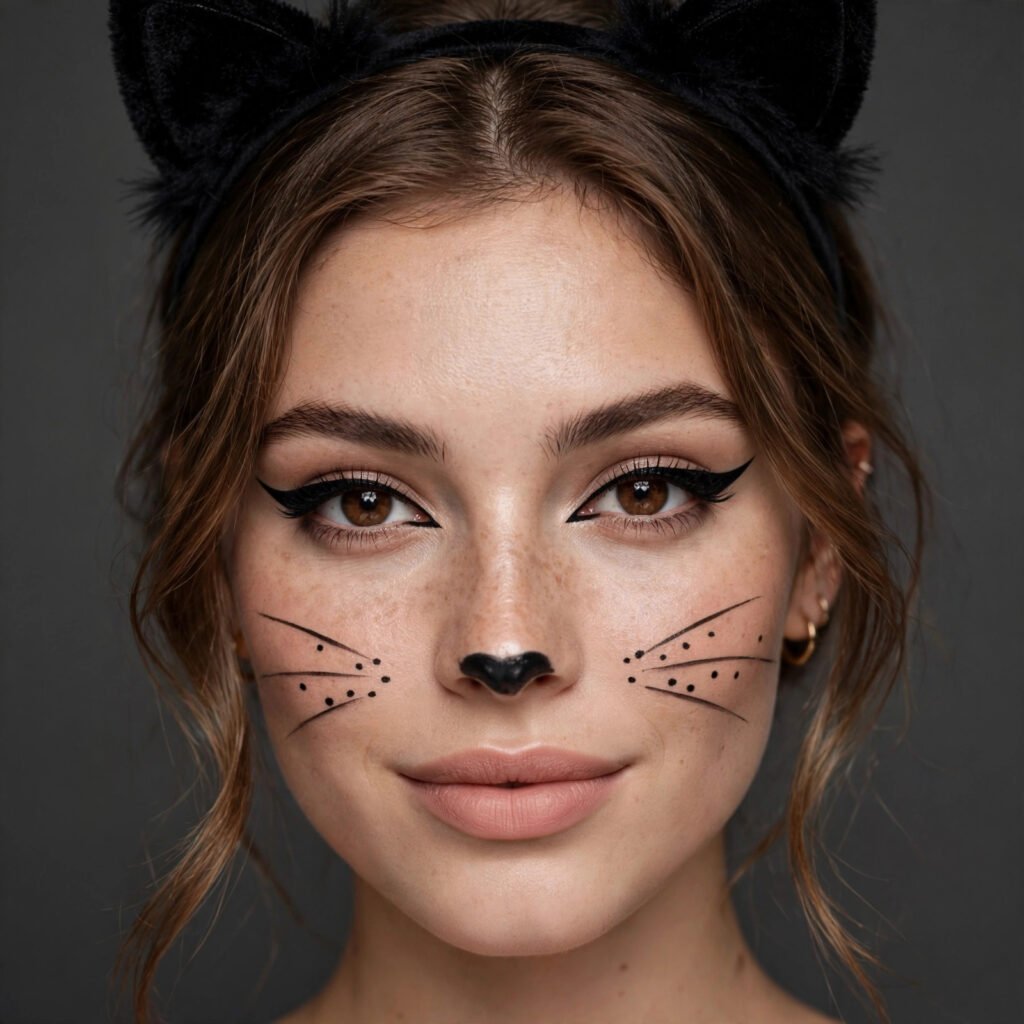
1. Classic Cat
- You’ll need: Black liquid eyeliner, bronzer or contour powder, a nude lipstick.
- Time: About 15 minutes.
- Best for: Beginners and last-minute costumes.
- Do your normal base makeup first — foundation and a little powder.
- Draw a small black triangle on the tip of your nose and fill it in.
- Use the eyeliner to draw three thin whiskers on each cheek, starting near the nose.
- Add a sharp winged eyeliner on both eyes.
- Finish with a nude or soft pink lipstick. Pair with cat ears if you have them.
The whiskers don’t need to be perfectly even. Slightly uneven whiskers just look more natural.
2. Simple Ghost
- You’ll need: White face paint or a very light foundation, black eyeliner, setting powder.
- Time: About 10 minutes.
- Best for: The fastest Halloween look there is.
- Apply an even layer of white face paint or light foundation all over your face.
- Smudge black eyeliner or dark eyeshadow under both eyes for a hollow, haunting effect.
- Keep your lips pale — a little white paint or light concealer works.
- Set everything with a light dusting of powder so it doesn’t transfer.
This is one of the easiest looks for beginners because there are no shapes to get right — messy actually helps.
3. Easy Vampire
- You’ll need: Pale foundation or light concealer, dark red or burgundy lipstick, black or dark eyeshadow, black eyeliner.
- Time: About 20 minutes.
- Best for: A classic look with makeup you already own.
- Apply a pale base — one shade lighter than your normal foundation is enough.
- Blend dark eyeshadow around the eyes for a smoky, tired effect.
- Draw a sharp winged eyeliner.
- Apply dark red lipstick, then add a small drip of fake blood from one corner of the mouth if you like (optional).
- Add fake fangs to complete the costume.
You don’t need a white face to look like a vampire. Pale plus dark eyes and dark lips does most of the work.
4. Cute Pumpkin
- You’ll need: Orange eyeshadow or face paint, black eyeliner, brown eyeshadow.
- Time: About 20 minutes.
- Best for: A cute look that isn’t scary at all.
- Do your normal base makeup.
- Sweep orange eyeshadow across the eyelids and blend it softly upward.
- Use black eyeliner to draw a tiny pumpkin shape on one cheek.
- Add a small green stem on top of the pumpkin with green eyeliner or eyeshadow.
- Finish with an orange-toned lipstick or a soft nude lip.
Keep the pumpkin small — one accent on the cheek looks intentional, while a full-face pumpkin is much harder to pull off.
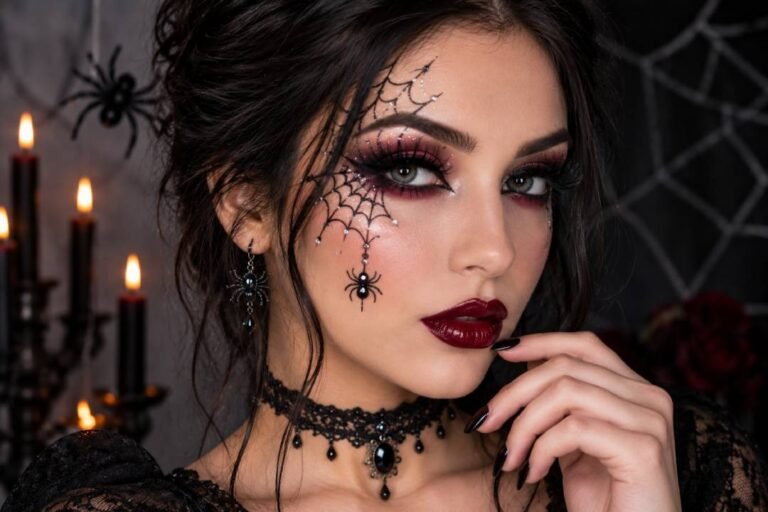
5. Spiderweb Eyes
- You’ll need: Black liquid eyeliner, a thin brush or fine liner, mascara.
- Time: About 20 minutes.
- Best for: Anyone who can draw a winged liner.
- Apply your normal eye makeup and mascara.
- Starting at the outer corner of one eye, draw three or four thin lines fanning outward like spokes.
- Connect the spokes with small curved lines to form a web.
- Repeat on the other eye, or keep one eye plain for an accent look.
- Add a tiny spider dot on the web if you want extra detail.
Do this look last, after the rest of your makeup, so a slip doesn’t ruin your base.
6. Fake Scar
- You’ll need: A matte pink or red lipstick, black eyeliner, concealer, setting powder.
- Time: About 15 minutes.
- Best for: Last-minute costumes — scars work with any outfit.
- Decide where the scar goes — cheek, forehead, or neck all work.
- Draw a thin, slightly uneven line with the lipstick or eyeliner.
- Add a few short cross-lines along it to look like stitches.
- Dab concealer lightly around the edges to soften the line.
- Set with powder so it doesn’t smudge.
Fake scars look more real when the line isn’t perfectly straight. A slightly wobbly line reads as skin texture.
7. Simple Witch
- You’ll need: Green-tinted eyeshadow or a green cream base (optional), dark eyeshadow, black eyeliner, dark purple or black lipstick.
- Time: About 25 minutes.
- Best for: A classic costume with dramatic eyes.
- Apply your normal base. If you want a greenish tint, mix a tiny amount of green eyeshadow into your foundation — a little goes a long way.
- Blend dark eyeshadow across the lids and into the crease for a deep, smoky eye.
- Draw a sharp winged liner and add dark, arched brows.
- Apply dark purple or black lipstick.
- Add a pointed witch hat to finish the costume.
Skip the green base entirely if you prefer — dark eyes plus dark lips already reads as “witch” to everyone.
8. Cute Clown
- You’ll need: White face paint or light foundation (optional), red lipstick, black eyeliner, blush.
- Time: About 25 minutes.
- Best for: A playful look that isn’t frightening.
- Apply your normal base. For a softer clown, skip the white face and keep your natural skin tone.
- Draw a small red circle on the tip of your nose with lipstick.
- Add rosy blush circles on both cheeks.
- Draw a slightly oversized smile with red lipstick, extending just past the corners of your mouth.
- Add small black dots or stars around one eye for a playful detail.
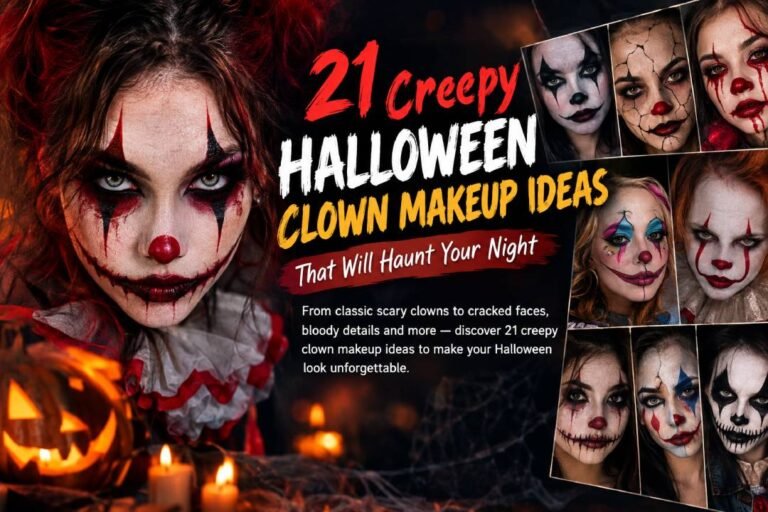
If you want the full creepy version instead, see the Creepy Clown look in the scary section below. And if clowns are your thing, our detailed Creepy Halloween Clown Makeup guide covers 21 clown looks.
9. Simple Sugar Skull
- You’ll need: White face paint or light foundation, black eyeliner, colorful eyeshadow (pink, blue, or purple), small gems (optional).
- Time: About 30 minutes.
- Best for: A beautiful look that photographs well.
- Apply an even white base across the face.
- Draw large black circles around both eyes and fill them in lightly.
- Draw a small black shape on the nose to suggest a skull nose.
- Add colorful petals or swirls around the eyes with eyeshadow.
- Draw teeth lines across the lips with black eyeliner.
- Stick on a few small gems around the forehead or cheeks if you like.
Symmetry helps here more than in other looks, so take your time with the eye circles. Rest your elbow on a table for a steadier hand.
Medium Halloween Makeup Ideas (Difficulty 3)
These looks need more layering, blending, or patience than the easy ones. Do a practice run a day or two before Halloween if you can — it takes the pressure off on the night.
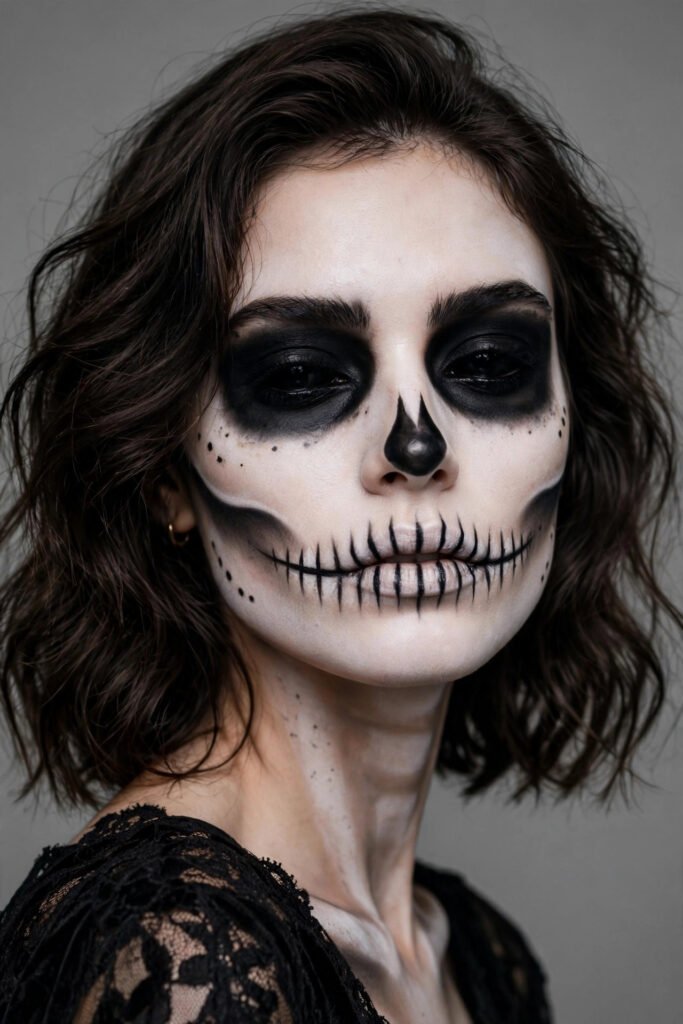
10. Skeleton
- You’ll need: White face paint, black face paint or gel eyeliner, setting powder.
- Time: About 40 minutes.
- Best for: A classic spooky look that always reads clearly in photos.
- Apply an even white base over the whole face, including the lips.
- Use black paint to fill in large hollow circles around both eyes.
- Paint a small upside-down heart or triangle on the nose.
- Draw vertical teeth lines across the mouth, extending slightly past the lip line.
- Shade the cheekbones with black paint to hollow out the cheeks.
- Set with powder so the white doesn’t transfer onto your costume.
Work in thin layers. Thick face paint cracks as it dries, and thin layers last longer.
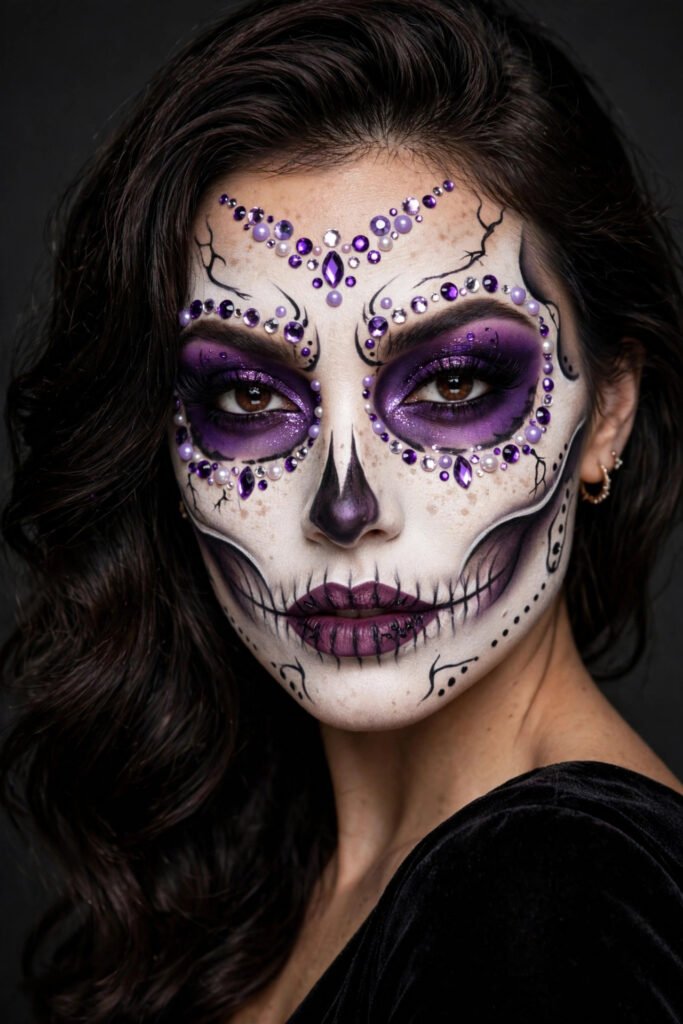
11. Glam Diamond Skull
- You’ll need: White face paint, thick black pencil or gel eyeliner, purple eyeshadow, stick-on face gems.
- Time: About 50 minutes.
- Best for: Glam rather than gory — skull shape, sparkly finish.
- Apply a white base, leaving the eye area for later.
- Trace the skull outline of your own face with the black pencil — around the eyes, nose, and jaw.
- Fill the eye sockets with purple eyeshadow and blend the edges.
- Draw teeth lines across the lips.
- Press face gems along the forehead, cheekbones, or around the eye sockets.
- Set with powder, avoiding the gems.
The gems do a lot of the work here. Even a simple skull outline looks impressive once the gems go on.
12. Mermaid
- You’ll need: Blue, green, and purple eyeshadow, highlighter, stick-on gems or pearls, fishnet stocking or stencil (optional).
- Time: About 45 minutes.
- Best for: A magical, colorful look that isn’t scary.
- Apply your normal base and a shimmery highlighter on the cheekbones.
- To create scales: hold a fishnet stocking gently against one cheek, dab eyeshadow over it, then lift it away. The net pattern leaves a scale effect.
- Blend blue, green, and purple eyeshadow across the eyelids.
- Add iridescent glitter around the eyes and cheeks.
- Stick small gems or pearls along the temples or hairline.
- Finish with a metallic or pastel lipstick.
The fishnet trick is the secret to this look. Practice it once on your hand first to get the pressure right.
13. Fairy
- You’ll need: Glitter eyeshadow, blush-toned eyeshadow, stick-on gems, highlighter.
- Time: About 45 minutes.
- Best for: Glitter lovers who don’t mind building a look slowly.
- Apply your normal base with a glowy finish.
- Sweep blush-toned eyeshadow across the lids and up toward the temples.
- Layer glitter eyeshadow on top, pressing it on rather than brushing, so it sticks.
- Add small stars or swirls on the cheeks with a fine brush.
- Stick gems around the eyes and forehead.
- Finish with a glossy pink lip and plenty of highlighter.
This look is mostly layering — no single step is hard, but rushing the layers makes it look patchy. Give each layer a minute to settle.
14. Zombie
- You’ll need: Pale foundation or grey-toned face paint, dark eyeshadow (black, green, brown), fake blood (optional), dark lipstick.
- Time: About 40 minutes.
- Best for: A messy look where imperfection helps.
- Apply a pale or greyish base — uneven is fine here.
- Smudge dark eyeshadow around the eyes and cheekbones to look sunken and tired.
- Add blotches of green and brown eyeshadow on the forehead and jaw for a decayed effect.
- Darken the lips with a muted or grey-toned lipstick.
- Add fake blood dripping from the mouth or a fake wound if you like.
- Mess up your hair and add dirt smudges to finish.
Zombie makeup is one of the most forgiving looks because it is supposed to look rough. Don’t aim for neat.
15. Fortune Teller
- You’ll need: Eyeshadow in one color family (matte, cream, and glitter finishes), matching lipstick, black eyeliner, a coin or gem for the forehead (optional).
- Time: About 40 minutes.
- Best for: Color lovers — any color works instead of purple.
- Apply your normal base.
- Build the eye look in layers: matte shadow in the crease, cream shadow on the lid, glitter shadow in the inner corner.
- Draw a soft winged liner.
- Apply a matching lipstick in the same color family as your eyes.
- Stick a small gem or coin in the center of the forehead for the fortune-teller detail.
- Add a headscarf or hoop earrings to complete the costume.
Keeping everything in one color family is what makes this look feel intentional instead of random.
16. Bat Eyeliner
- You’ll need: Black liquid eyeliner, mascara, a small brush.
- Time: About 25 minutes.
- Best for: A subtle Halloween detail that works with everyday makeup.
- Do your normal eye makeup and mascara.
- At the outer corner of each eye, draw a small bat shape with the liquid liner — a rounded body with two pointed wings.
- Keep the bat small, about the size of your winged liner flick.
- Repeat on the other eye, or keep one eye plain for an accent.
- Clean up any mistakes with a cotton bud dipped in makeup remover.
This is a great option if you want a Halloween touch without a full costume face.
17. Unicorn
- You’ll need: Pastel eyeshadow (pink, blue, lavender), white eyeliner, glitter, pastel lipstick.
- Time: About 40 minutes.
- Best for: A dreamy, fun look that suits all ages.
- Apply a light, glowy base.
- Sweep pastel eyeshadow across the lids — pink on one side, blue on the other, blended in the middle.
- Add white eyeliner dots or tiny stars under the eyes.
- Press glitter onto the cheekbones and the bridge of the nose.
- Apply a pastel pink or lavender lipstick.
- Add a horn headband to complete the costume.
Keep the colors soft. Pastels are what make this look read as “unicorn” rather than just colorful.
18. Cracked Doll
- You’ll need: Pale foundation, black eyeliner, blush, red lipstick.
- Time: About 35 minutes.
- Best for: Creepy but pretty — perfect makeup with cracks painted on.
- Apply a flawless pale base — this look works best when the base makeup looks neat.
- Do a neat eye look with winged liner and blush on the cheeks.
- Apply red lipstick neatly.
- Now add the cracks: draw thin, branching black lines from one eye down the cheek, and a few across the forehead.
- Add a small crack line across one lip.
- Keep the rest of the face clean so the cracks stand out.
The contrast between neat makeup and the cracks is the whole effect. Don’t smudge anything else once the cracks are drawn.
Scary Halloween Makeup Ideas (Difficulty 4–5)
These are the showstoppers. They take the most time and benefit most from a practice run. If you are new to costume makeup, pick one and practice it once before Halloween night.
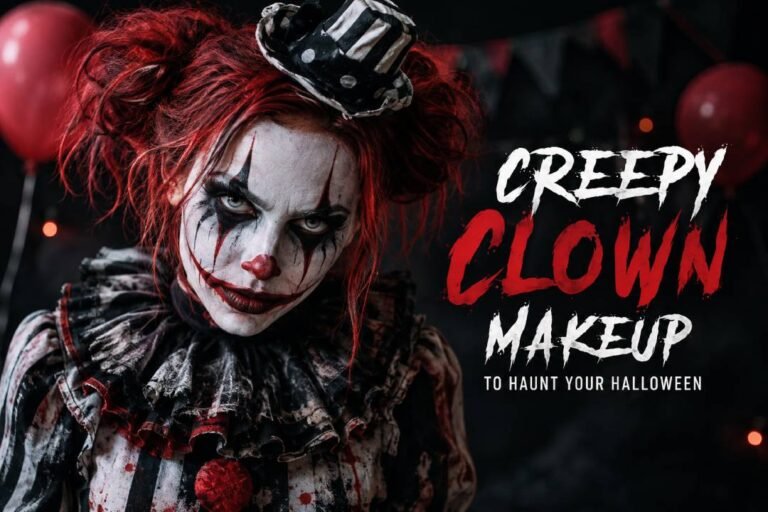
19. Creepy Clown
- You’ll need: White face paint, red lipstick, black eyeliner, setting powder.
- Time: About 60 minutes.
- Best for: A full transformation that scares and impresses.
- Apply an even white base over the whole face.
- Draw exaggerated black arches above your natural eyebrows.
- Paint a large red smile extending well past the corners of your mouth.
- Add a red nose and red circles on the cheeks.
- Draw thin black lines radiating from the eyes and mouth for a cracked effect.
- Set with powder and add a wild wig to finish.
For 21 clown variations, from cute to full horror, see our Creepy Halloween Clown Makeup guide.
20. Melted Pumpkin
- You’ll need: Orange face paint, black face paint, brown eyeshadow, setting powder.
- Time: About 55 minutes.
- Best for: A dramatic look that gets attention in photos.
- Apply an orange base over the face, blending it down the neck slightly.
- Use a thin brush to draw black jack-o’-lantern features — triangle eyes and a jagged smile.
- Add drip shapes running down from the eyes and mouth, as if the pumpkin is melting.
- Shade the edges of the face with brown eyeshadow for depth.
- Set with powder.
The melting drips are what make this look special. Make them different lengths: uniform drips look stamped on.
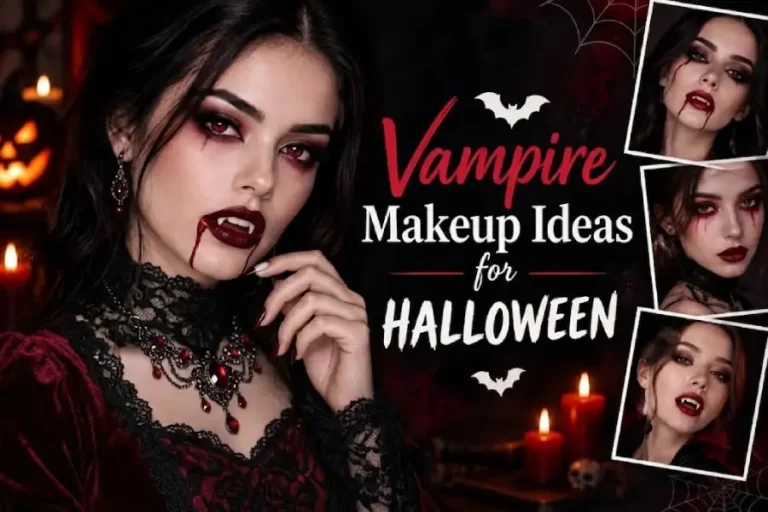
21. Gothic Vampire
- You’ll need: Very pale foundation, black and red eyeshadow, black eyeliner, deep red or black lipstick, fake blood.
- Time: About 50 minutes.
- Best for: A dramatic, elegant vampire rather than a simple one.
- Apply a very pale base, blending it into the neck.
- Build a dark smoky eye with black eyeshadow, blended up toward the brow.
- Add a touch of red eyeshadow at the inner corners for a bloodshot effect.
- Draw sharp winged liner and dark brows.
- Apply deep red or black lipstick, then add fake blood dripping from the lips.
- Add fake fangs and style the hair back for a sharp finish.
This is the advanced version of the Easy Vampire from the first section. If you are short on time, the easy version still works well.
22. Neon Skeleton
- You’ll need: White face paint, black face paint, neon or UV-reactive face paint (green, pink, or orange), setting powder.
- Time: About 55 minutes.
- Best for: Parties with blacklight — this look glows.
- Apply the white base and black skeleton shading as in the Skeleton look above.
- Once the black shading is dry, trace neon paint along the edges of the eye sockets, nose, and teeth lines.
- Add neon dots or lines along the cheekbones and forehead.
- Set carefully with powder, avoiding the neon areas as much as possible.
- Check the look under a lamp or phone light — neon shows up best in dim light.
Only use neon products labeled for use on skin. Craft or fabric neon paint is not made for faces and should never go near your eyes.
23. Optical Illusion Face
- You’ll need: White and black face paint, fine liner brushes, setting powder.
- Time: 60 minutes or more.
- Best for: People who want a look everyone talks about.
- Plan the illusion first — a common one is a face that looks split in half, or features that appear to float.
- Apply the white base on the areas you want to highlight.
- Use black paint to draw shadows and outlines that trick the eye — for example, a second “mouth” or a warped nose.
- Blend the edges carefully. The illusion depends on smooth shading, not harsh lines.
- Step back and check in a mirror from a normal distance, not up close.
- Set with powder.
This is the hardest look in this guide. Watch a tutorial once before attempting it, and give yourself extra time.
24. Scarred Lion
- You’ll need: Gold and brown face paint, black eyeliner, dark lipstick, setting powder.
- Time: About 50 minutes.
- Best for: A dramatic animal-inspired character look.
- Apply a golden-brown base over the face.
- Shade the cheekbones and jaw with darker brown for a feline bone structure.
- Draw a scar line over one eye with black liner, adding small stitch marks.
- Darken the eyes with brown and black eyeshadow.
- Apply a dark lipstick and add whisker dots on the cheeks.
- Add a mane-style wig or ears to finish.
The scar is the detail that turns a lion look into a character look. Keep it thin and slightly uneven.
25. Stitched Doll
- You’ll need: Pale foundation, black eyeliner, pink blush, red lipstick, setting powder.
- Time: 60 minutes or more.
- Best for: A creepy doll look with serious detail.
- Apply a very pale, even base — doll skin should look smooth and matte.
- Draw large, round eyes with black liner, extending the lash line for a doll-like stare.
- Add heavy blush circles on the cheeks.
- Draw stitch lines across the forehead, cheeks, and around the mouth with black liner, adding small cross-marks along each line.
- Apply red lipstick in a small, rounded doll shape.
- Set with powder.
The stitch lines need a steady hand. Rest your elbow on a table and draw them slowly, one at a time.
Last-Minute Halloween Makeup (Under 15 Minutes)
Short on time? These looks from the list above can be done in 15 minutes or less:
- Simple Ghost (10 min) — white base, smudged eyes, done.
- Classic Cat (15 min) — nose triangle, whiskers, winged liner.
- Fake Scar (15 min) — one line, a few stitch marks, any outfit.
- Bat Eyeliner (25 min for both eyes, but 10 min for one accent eye) — one small bat, everyday makeup.
Last-minute tip: pick a look where messy helps. Ghost, Zombie, and Fake Scar all look better slightly rough, so they are the safest choices when you are rushing.
Halloween Makeup With No Face Paint (Normal Makeup Only)
You don’t need face paint for a great Halloween look. The ideas below use only everyday makeup:
- Classic Cat, Easy Vampire, Spiderweb Eyes, Fake Scar, Simple Witch, Fairy, Fortune Teller, Bat Eyeliner, Unicorn, Cracked Doll.
The trick is to lean on eyeliner and eyeshadow for the shapes, and on lipstick for color. Eyeliner draws the lines, eyeshadow creates the shading, and lipstick gives you bold color for noses, smiles, and scars. If you already own a black liquid liner, a dark eyeshadow palette, and a red lipstick, you can do most of the easy looks without buying anything.
Trending Halloween Makeup Looks for 2026
A few Halloween looks are trending everywhere this year:
- Neon and UV looks: neon skeletons and glowing accents photograph brilliantly and work especially well at parties with blacklight.
- Optical illusion faces: split faces, floating features, and warped shapes get the most reactions, but they need practice.
- Glam skulls: skull shapes with gems and glitter instead of gore. Pretty and spooky at the same time.
- Minimal accent looks: one small detail (a bat, a web, a scar) with otherwise normal makeup. The easiest trend to actually wear.
Trends come and go, so pick the one that fits your skill level and the time you have, not just the one that looks best in photos.
Sensitive Skin Safety: Read This Before You Start
Costume makeup sits on your skin for hours, so a little care goes a long way:
- Use products made for skin. Only use face paint and cosmetics labeled for use on skin. Craft paint, fabric paint, and acrylic paint are not made for faces and should never be used as makeup.
- Patch test first. Dab a small amount of any new product on the inside of your forearm at least a day before Halloween. If the area stings, itches, or turns red, don’t use that product on your face.
- Keep products away from your eyes unless the label says the product is safe for eye use. This matters most for glitter, gems, and face paint.
- Don’t share face paint or applicators. Sharing can spread skin irritation and infection.
- Stop if your skin reacts. If anything stings, burns, or itches during wear, remove the makeup right away with a gentle cleanser and don’t reapply it.
- Kids need extra care. Use only face-safe products on children, keep paint away from their eyes and mouth, and remove it promptly after the event. Our Easy Face Paint Ideas for Kids guide has 25 simple designs made for younger faces.
If you have a known skin condition or allergy, check product ingredients carefully and consider doing your look with your regular, trusted makeup instead of new face paint.
How to Remove Halloween Makeup (Without Irritating Your Skin)
Removal matters as much as application. Scrubbing is the most common mistake — it irritates skin and pushes pigment deeper.
- Melt it off first. Massage a cleansing balm or oil over the makeup for about a minute. Oil dissolves face paint, long-wear lipstick, and glitter far better than water alone.
- Wipe gently. Use a soft cloth or cotton pad to lift the dissolved makeup away. Don’t rub — press and lift.
- Wash with your usual cleanser. Follow with the gentle cleanser you normally use, then rinse with lukewarm water.
- Deal with glitter separately. Press a cotton pad soaked in oil or remover over glittery areas for 30 seconds before wiping. This stops glitter from scratching your skin.
- Moisturize. Apply your normal moisturizer right after. Costume makeup and removal can dry skin out.
- Clean your brushes. Wash brushes and sponges with warm water and a mild soap after use, especially if they touched face paint. Dirty brushes can irritate skin the next time you use them.
If any color remains after washing, leave it — it will usually fade after a night’s sleep and a second gentle wash. Scrubbing at it will only irritate your skin.
Normal Makeup vs Face Paint: Which Should You Use?
| Normal Makeup | Face Paint | |
|---|---|---|
| Best for | Easy and medium looks, details, shading | Full-face looks, solid color bases, bold shapes |
| Cost | Usually $0 (makeup you own) | Small kit, varies by brand |
| Skill needed | Low to medium | Medium — needs even application |
| Removal | Normal cleanser | Cleansing balm or oil first |
| Skin safety | Use your regular trusted products | Must be labeled for use on skin; patch test first |
| Lasts | A few hours, may fade | Often lasts longer, may crack if applied thick |
For most beginners, normal makeup covers the easy Halloween makeup ideas in this guide. Face paint is worth it when you want a solid white, green, or orange base across the whole face.
FAQs
What are the easiest Halloween makeup ideas for beginners?
The Classic Cat, Simple Ghost, and Fake Scar are the easiest. They need only a few products, take 10–15 minutes, and don’t require precise lines. Start with one of those if this is your first time trying Halloween makeup.
Can I use normal makeup instead of face paint?
Yes, for most looks. Eyeliner, eyeshadow, and lipstick can create cats, vampires, witches, scars, webs, and many more looks. Face paint is mainly needed when you want a solid color base across the whole face, like a white skeleton or an orange pumpkin.
How long does Halloween makeup take?
Easy looks take about 10–30 minutes. Medium looks take about 35–50 minutes. The detailed scary looks take about an hour or more, especially on a first attempt. A practice run a day before Halloween helps you learn the real time for your chosen look.
How do I make my Halloween makeup last all night?
Start with a primer, apply products in thin layers, and set with powder. Avoid touching your face, and carry a small powder compact for touch-ups. Setting spray can also help, but check that it suits your skin type first.
How do I remove Halloween makeup without irritating my skin?
Melt it off with a cleansing balm or oil first, wipe gently instead of scrubbing, then wash with your usual cleanser and moisturize. Press an oil-soaked cotton pad on glittery areas for 30 seconds before wiping.
Is Halloween face paint safe for sensitive skin?
It depends on the product. Choose face paint labeled for use on skin, patch test it on your inner forearm at least a day before, and stop using it if your skin stings, itches, or turns red. If you have sensitive skin or a known allergy, using your regular trusted makeup instead of new face paint is often the safer choice.
Can kids wear these Halloween makeup looks?
Simpler looks like the Cat, Ghost, and Pumpkin can work for older kids with face-safe products and adult supervision. Keep paint away from the eyes and mouth, and remove it promptly after the event. For designs made specifically for younger faces, see our Easy Face Paint Ideas for Kids guide .
What if I don’t have any brushes?
You can still do many looks. Use your fingers for blending eyeshadow, a cotton bud for small details and cleanup, and the tip of an eyeliner pencil for lines. A toothpick can help with tiny dots. You don’t need a full brush set to start.
Final Thoughts
The best Halloween makeup ideas are the ones you will actually enjoy wearing. A simple Cat done well beats a complicated illusion look that you rush and hate. Pick a look that fits your time, your skill, and the makeup you already own — then give yourself a practice run if you can.
Want matching nails to go with your look? Our Halloween Nail Ideas guide has 35 designs, from spooky to cute, with aftercare and budget tips.
Happy Halloween — and have fun with it!
Disclaimer: This article is for general inspiration and information. Use only products labeled for use on skin, patch test new products before use, and stop using any product if irritation occurs. If you have a skin condition or allergy, check product ingredients carefully.